
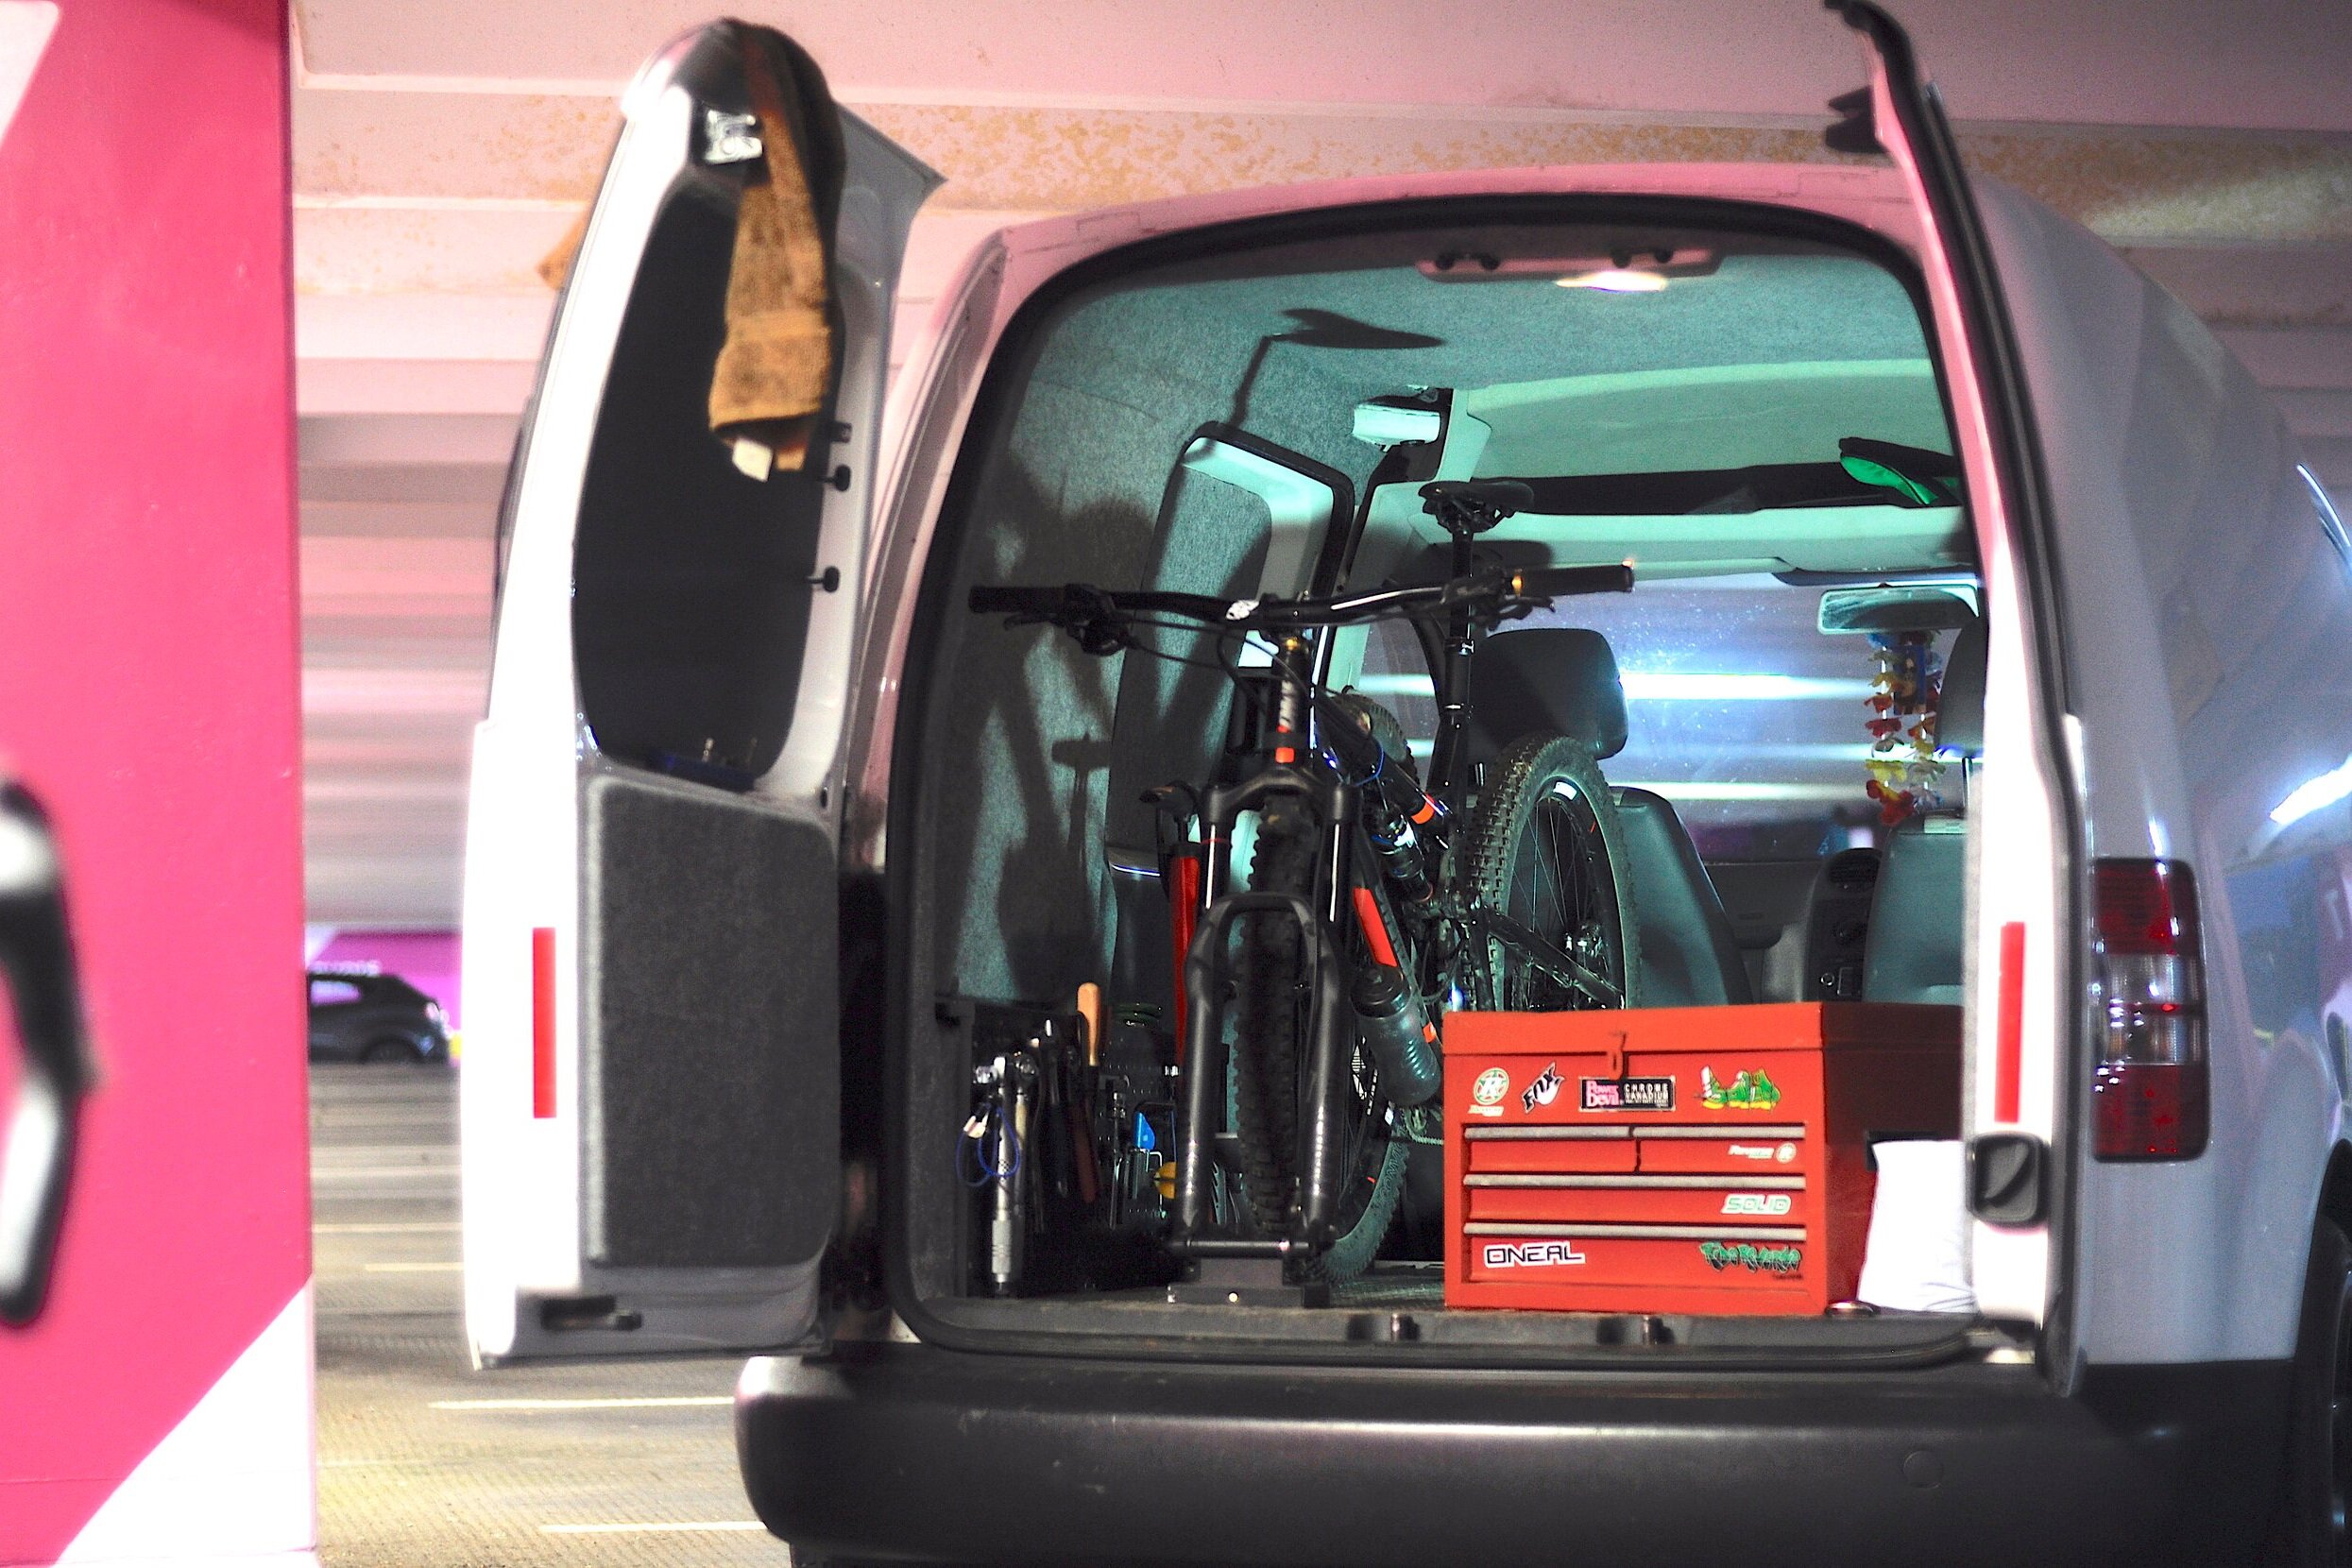
How I Converted My VW Caddy Into a Bike Van/Camper | Carpeting and Insulation
The VW Caddy van was the starting point for Lost Yak! I needed a van suitable to work out of, but also I wanted something comfortable that I could use for my own biking adventures in my free time. Here I show you my processes in carpeting and insulating my Caddy and try to give a little insight so you don’t make the same mistakes I did when converting your van into a bike ready machine.
Bare in mind I have written this presuming that my audience will have some DIY knowledge, so if there is anything else not included you want to ask feel free to get in contact.

Before
After
Videos Of My Bike Van Caddy Camper Conversion
Here’s a couple of quick videos showing my processes insulating, ply lining, carpeting and then flooring my VW Caddy, which are further explained below.
You Need For your Van Conversion:
Cleaning equipment - rags, spray, brake cleaner, hoover
Drill
Saw - ideally a Jigsaw
Self taping screws
Plywood sheet
Various types of insulation
Spray adhesive glue
Flooring - rubber mat or similiar
Flathead screw driver or Trim tool
Scissors
Insulation tape
Sharp knife
Details Of What I Used For My Caddy :
Note there are loads products like these out there, Ive had this set up for over a year now and everything I have used has been faultless. A quick google of what I have written below will show these exact products.
Carpet - 5m x 2m of super stretch carpet that included 5 free cans of TrimFix glue - £49.98
Flooring - 2m x 1.5m x 3mm coin pattern rubber flooring matting for car/ garage. - £26.90
Insulation - I used recycled plastic Thermafleece and general purpose Thermawrap bubble sheet.
- My biggest advice here is just ask! Loads of people have left over insulation from housing projects or their own camper vans! I luckily managed to get all of mine for free from a guy I met who had just finished his Transporter camper conversion! Anything else can be purchased at DIY stores.
Plywood - I mostly used 5mm thick to save on weight but went a bit thicker on the rear doors as I wanted to hang some shelving.
Where To Start?


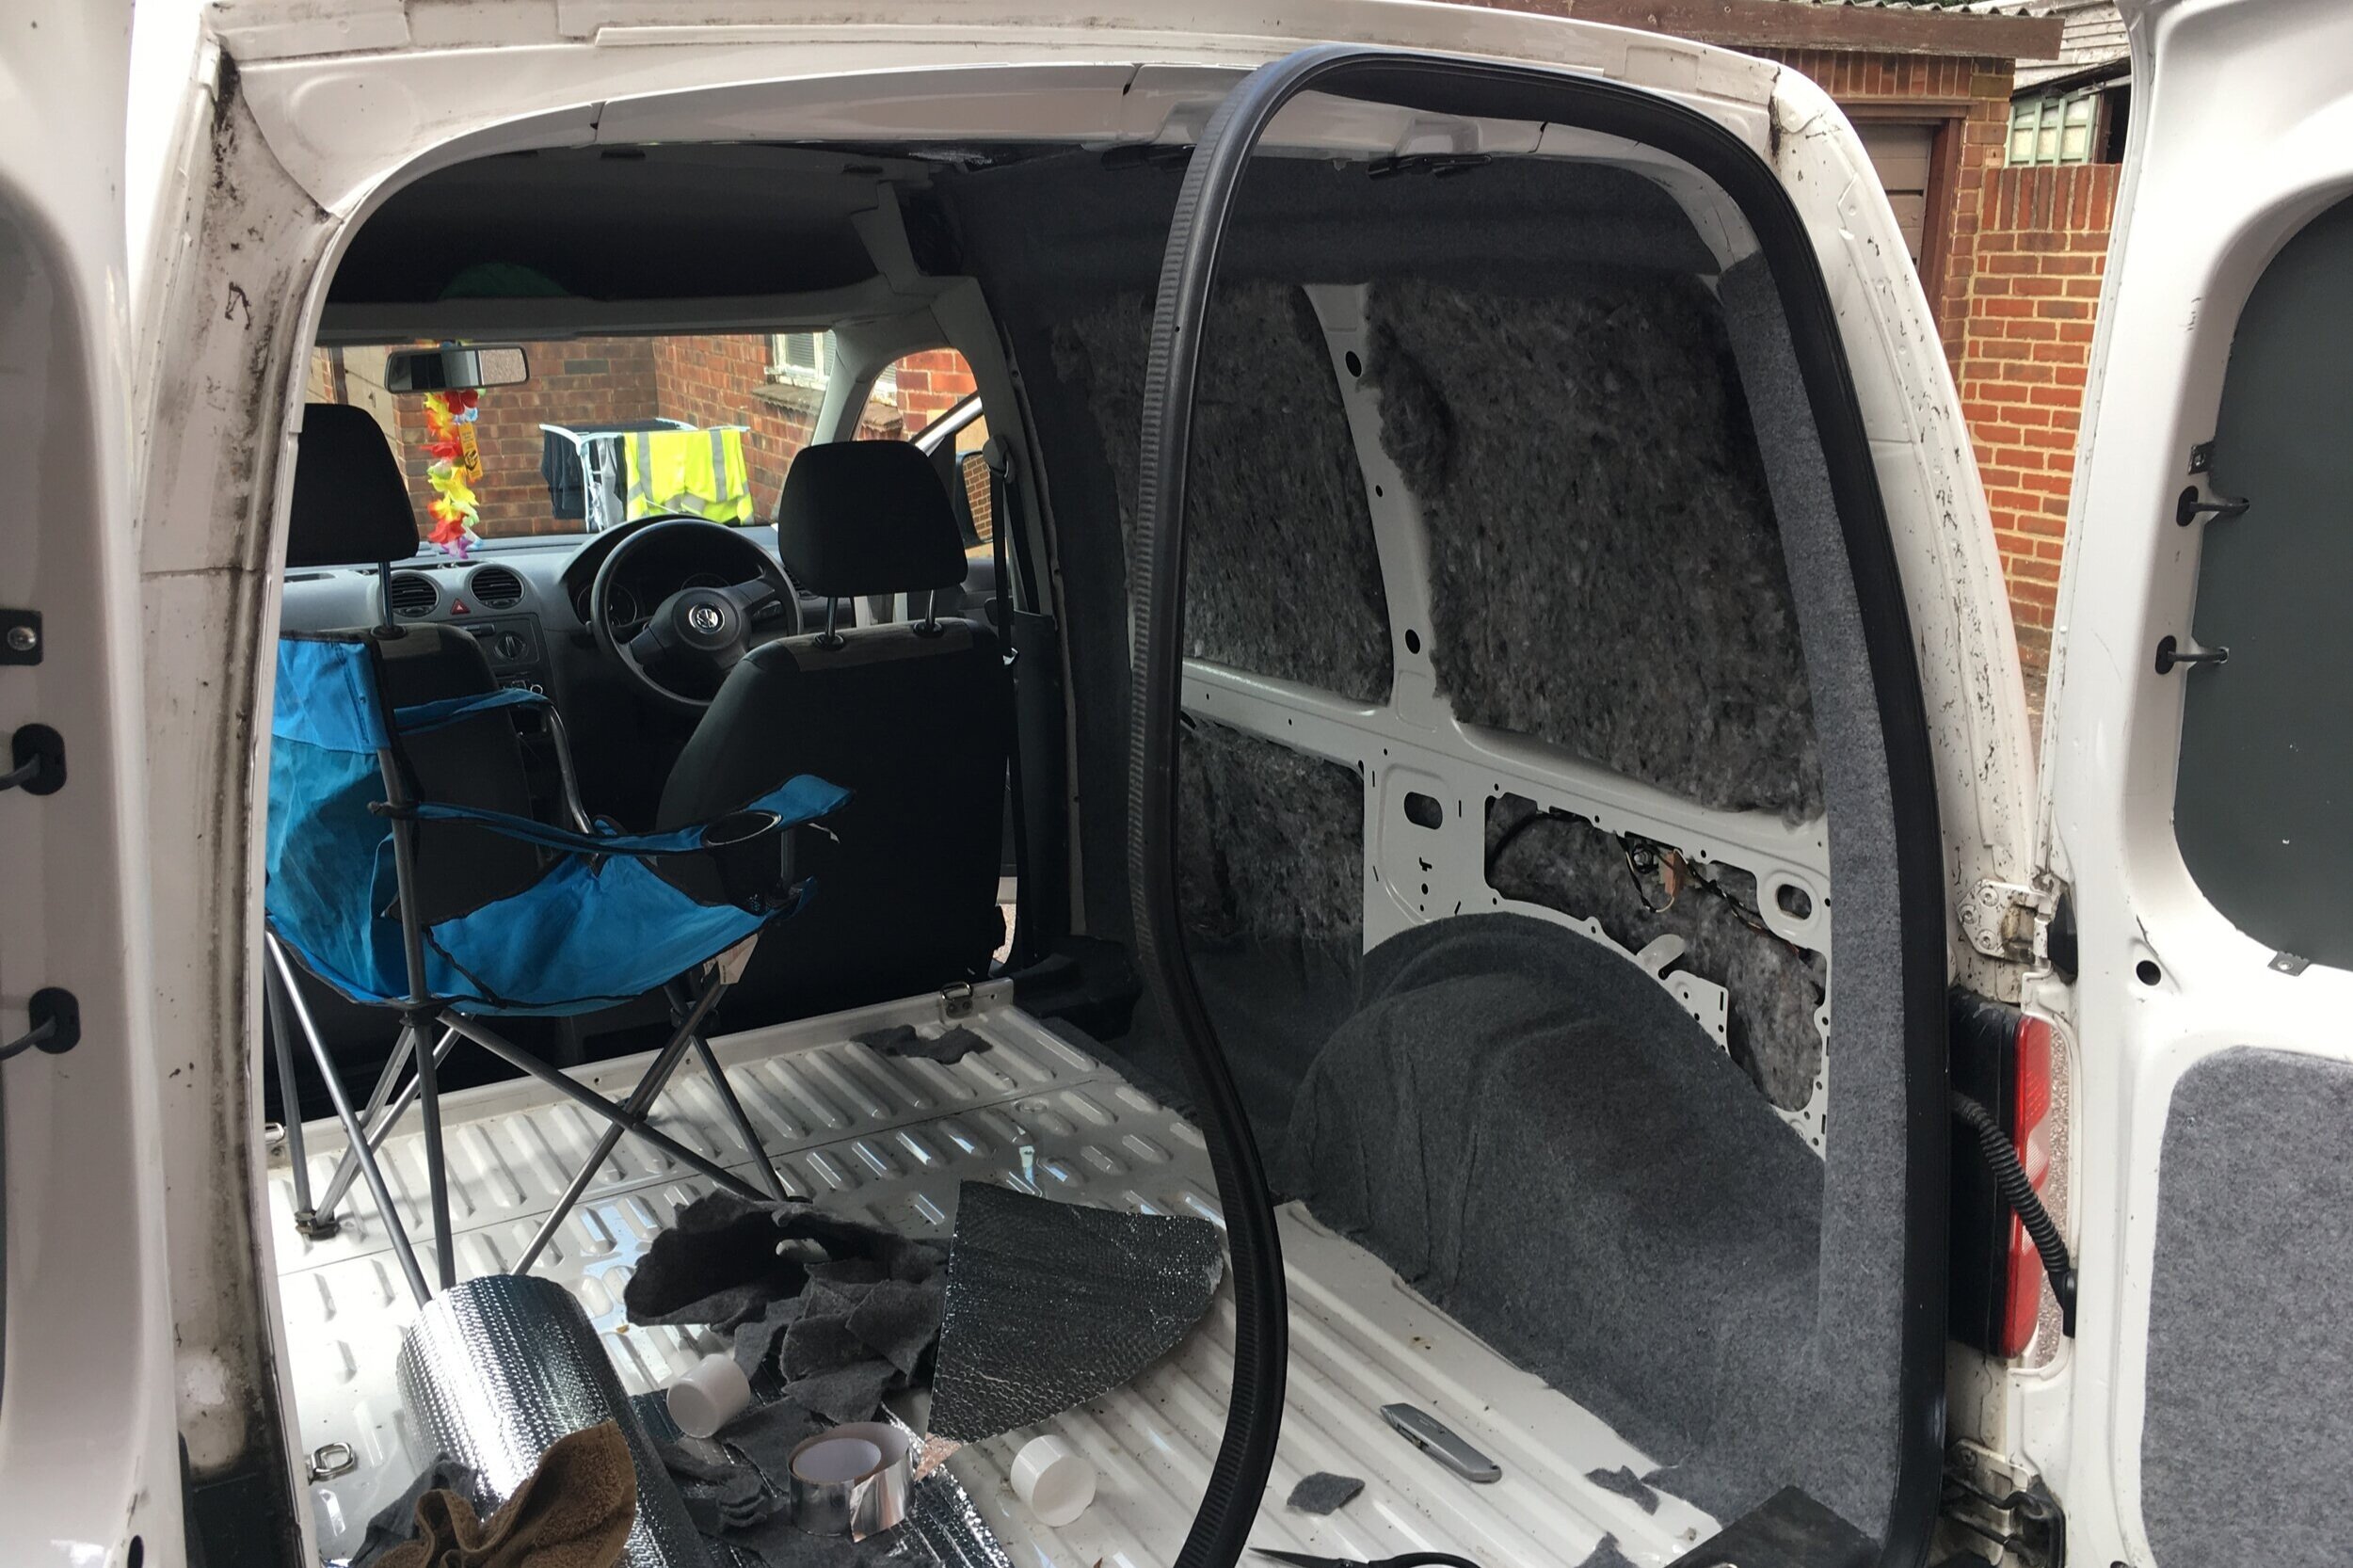
As you can see my VW Caddy came ply lined, although most of it was pretty shocking! I started by stripping everything out, setting aside what I would re use and cleaning behind the panels, I also removed the standard trims on the doors as they can make good templates for new Ply lining. Note I re used the roof panel so make sure thats put somewhere safe! It’s also a good idea to keep the flooring in for now as it will just get dirty while you work on the interior.
To Vapour Seal or to Not Vapour Seal?
Quite simply a vapour barrier is a complete wrap of plastic or the Thermawrap to create a seal between the van body and interior from water vapour. The idea is to prevent condensation building up between the insulation and the metal van exterior. I considered this but decided as it is a small van and I wouldn’t be sleeping in it for really long periods of time it wasn’t worth it as I could run the heaters when driving off the next day.
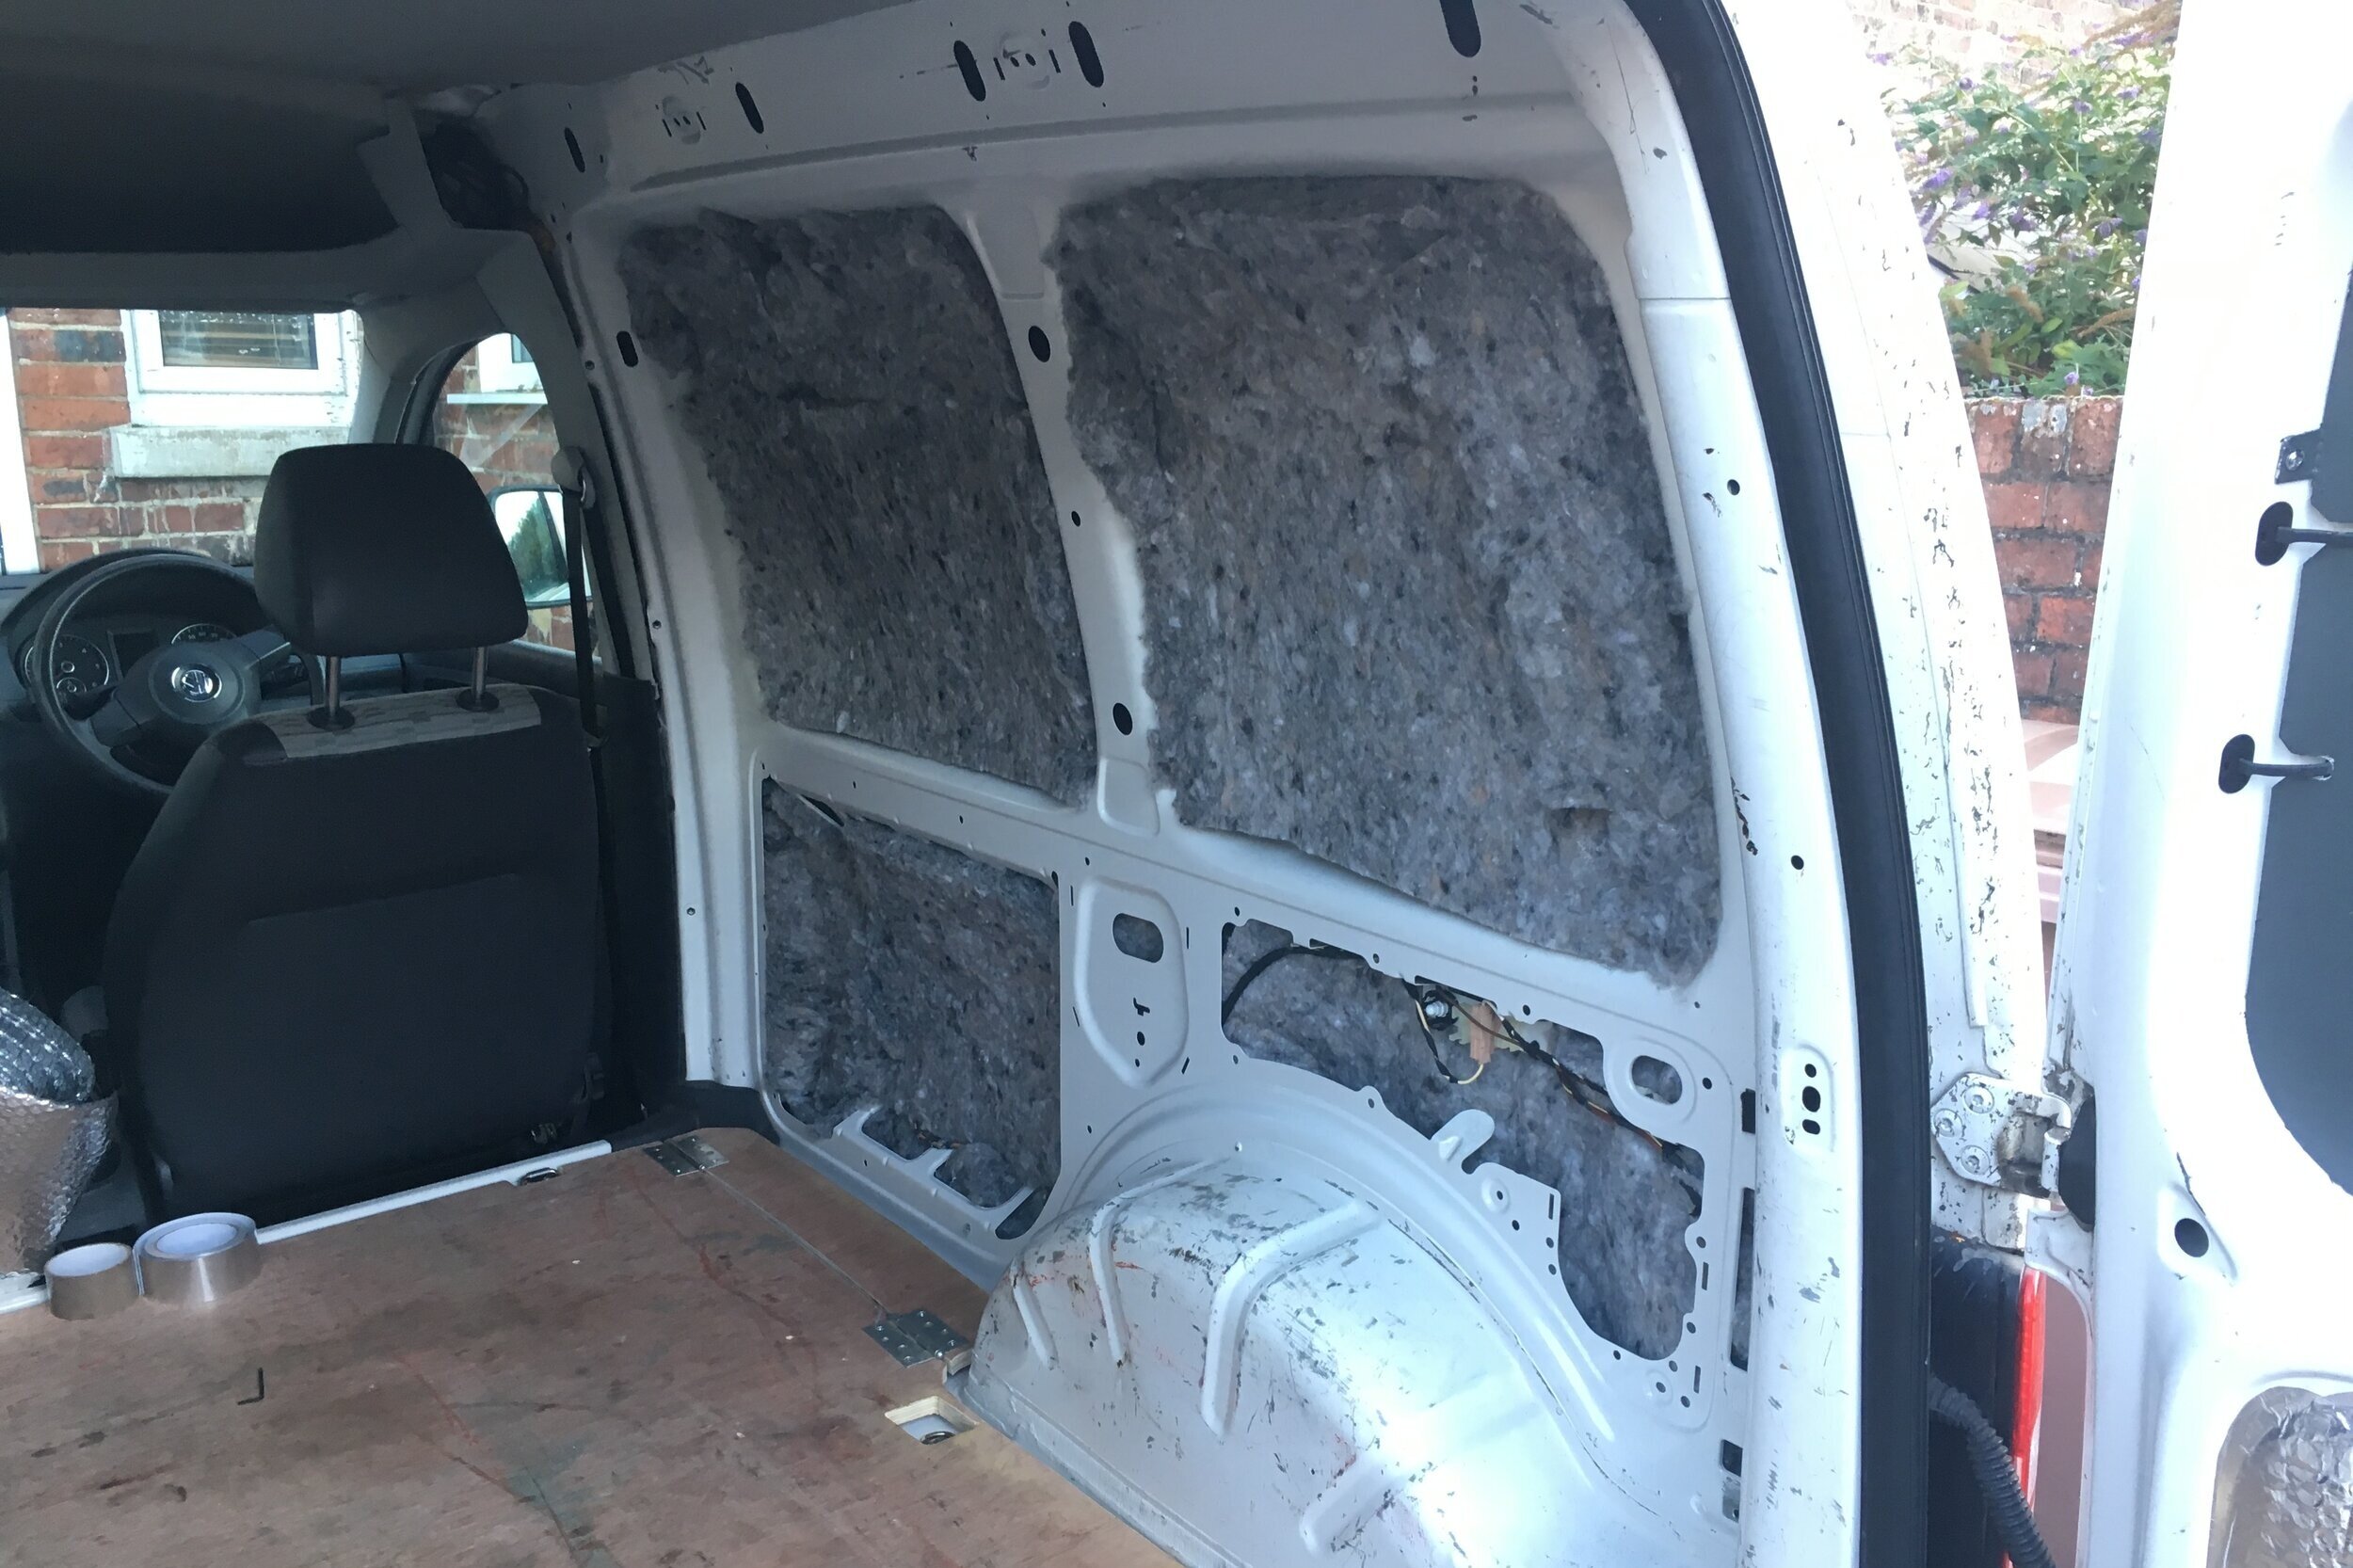
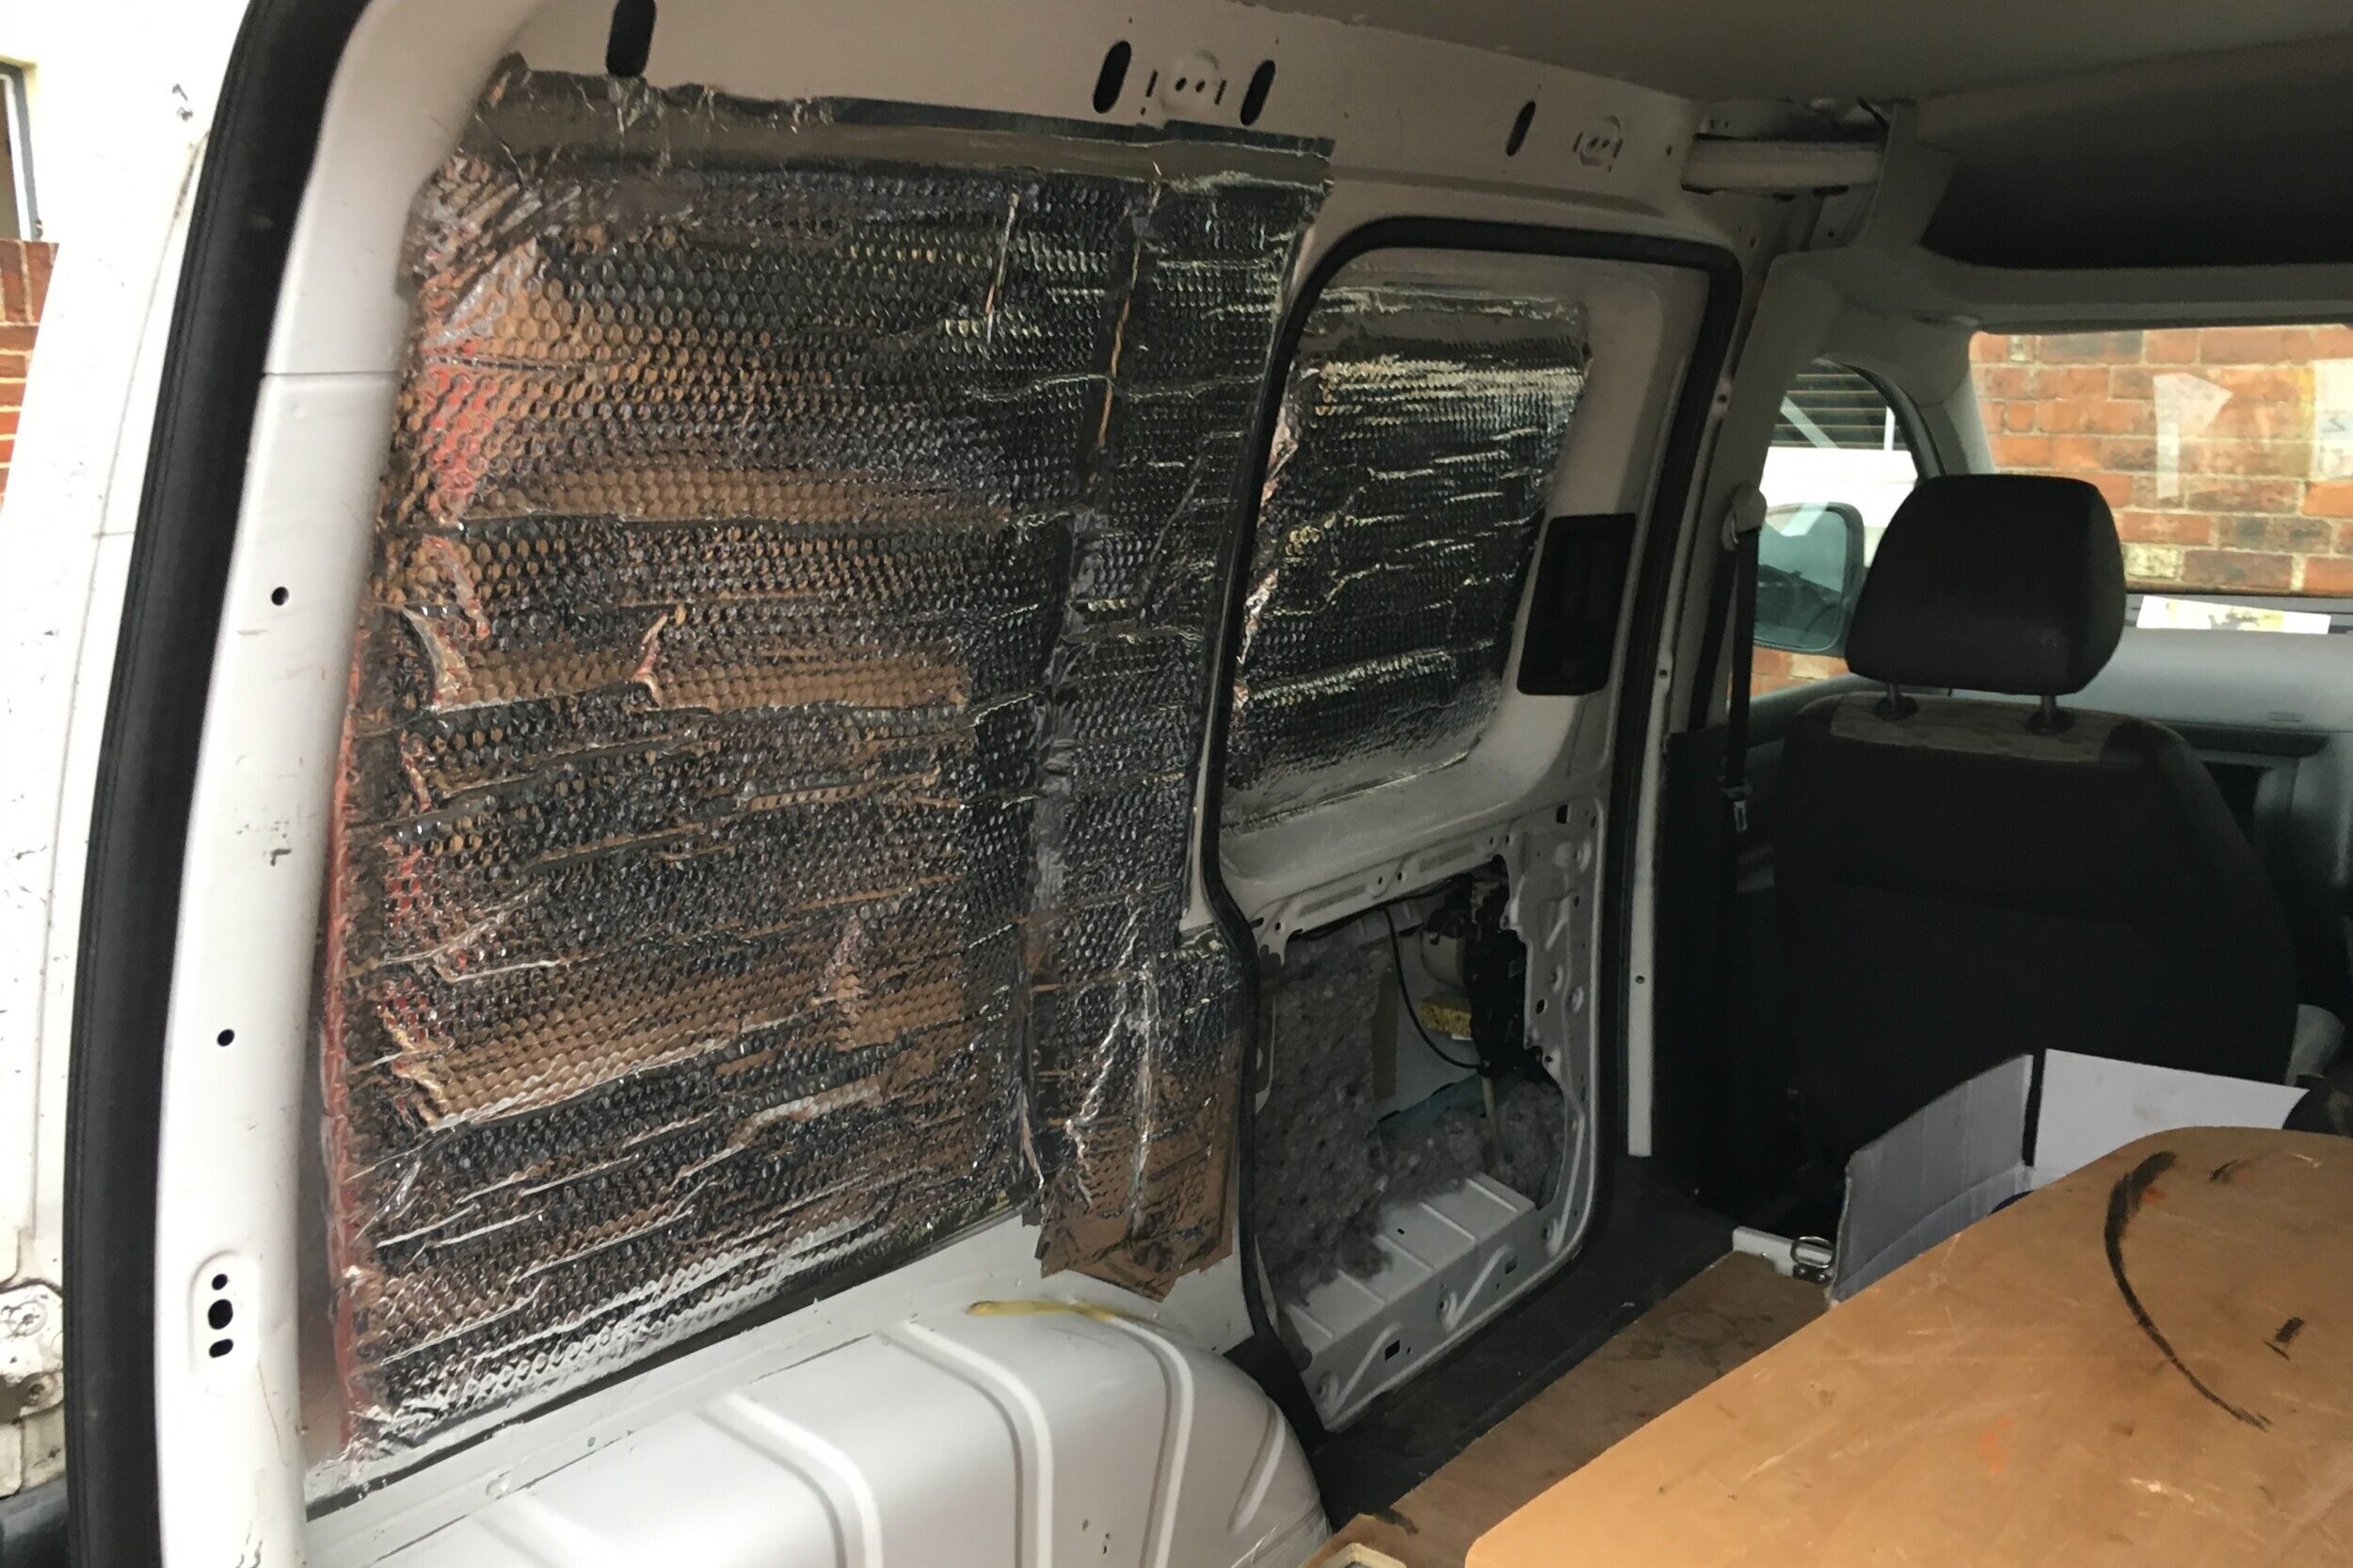
Once I had stripped everything out and given it a good clean I started by filling big gaps with the recycled plastic insulation. the key is not to stuff too much in as it actually reduces the insulating properties if its too compact. I used a bit of spray glue to hold it in place. Also its worth going easy on the insulation around any wires as if in future you need to get to them you don’t want to be ripping everything out! Then I covered the the filled gaps with the Thermowrap bubble insulation to further reflect heat inwards.

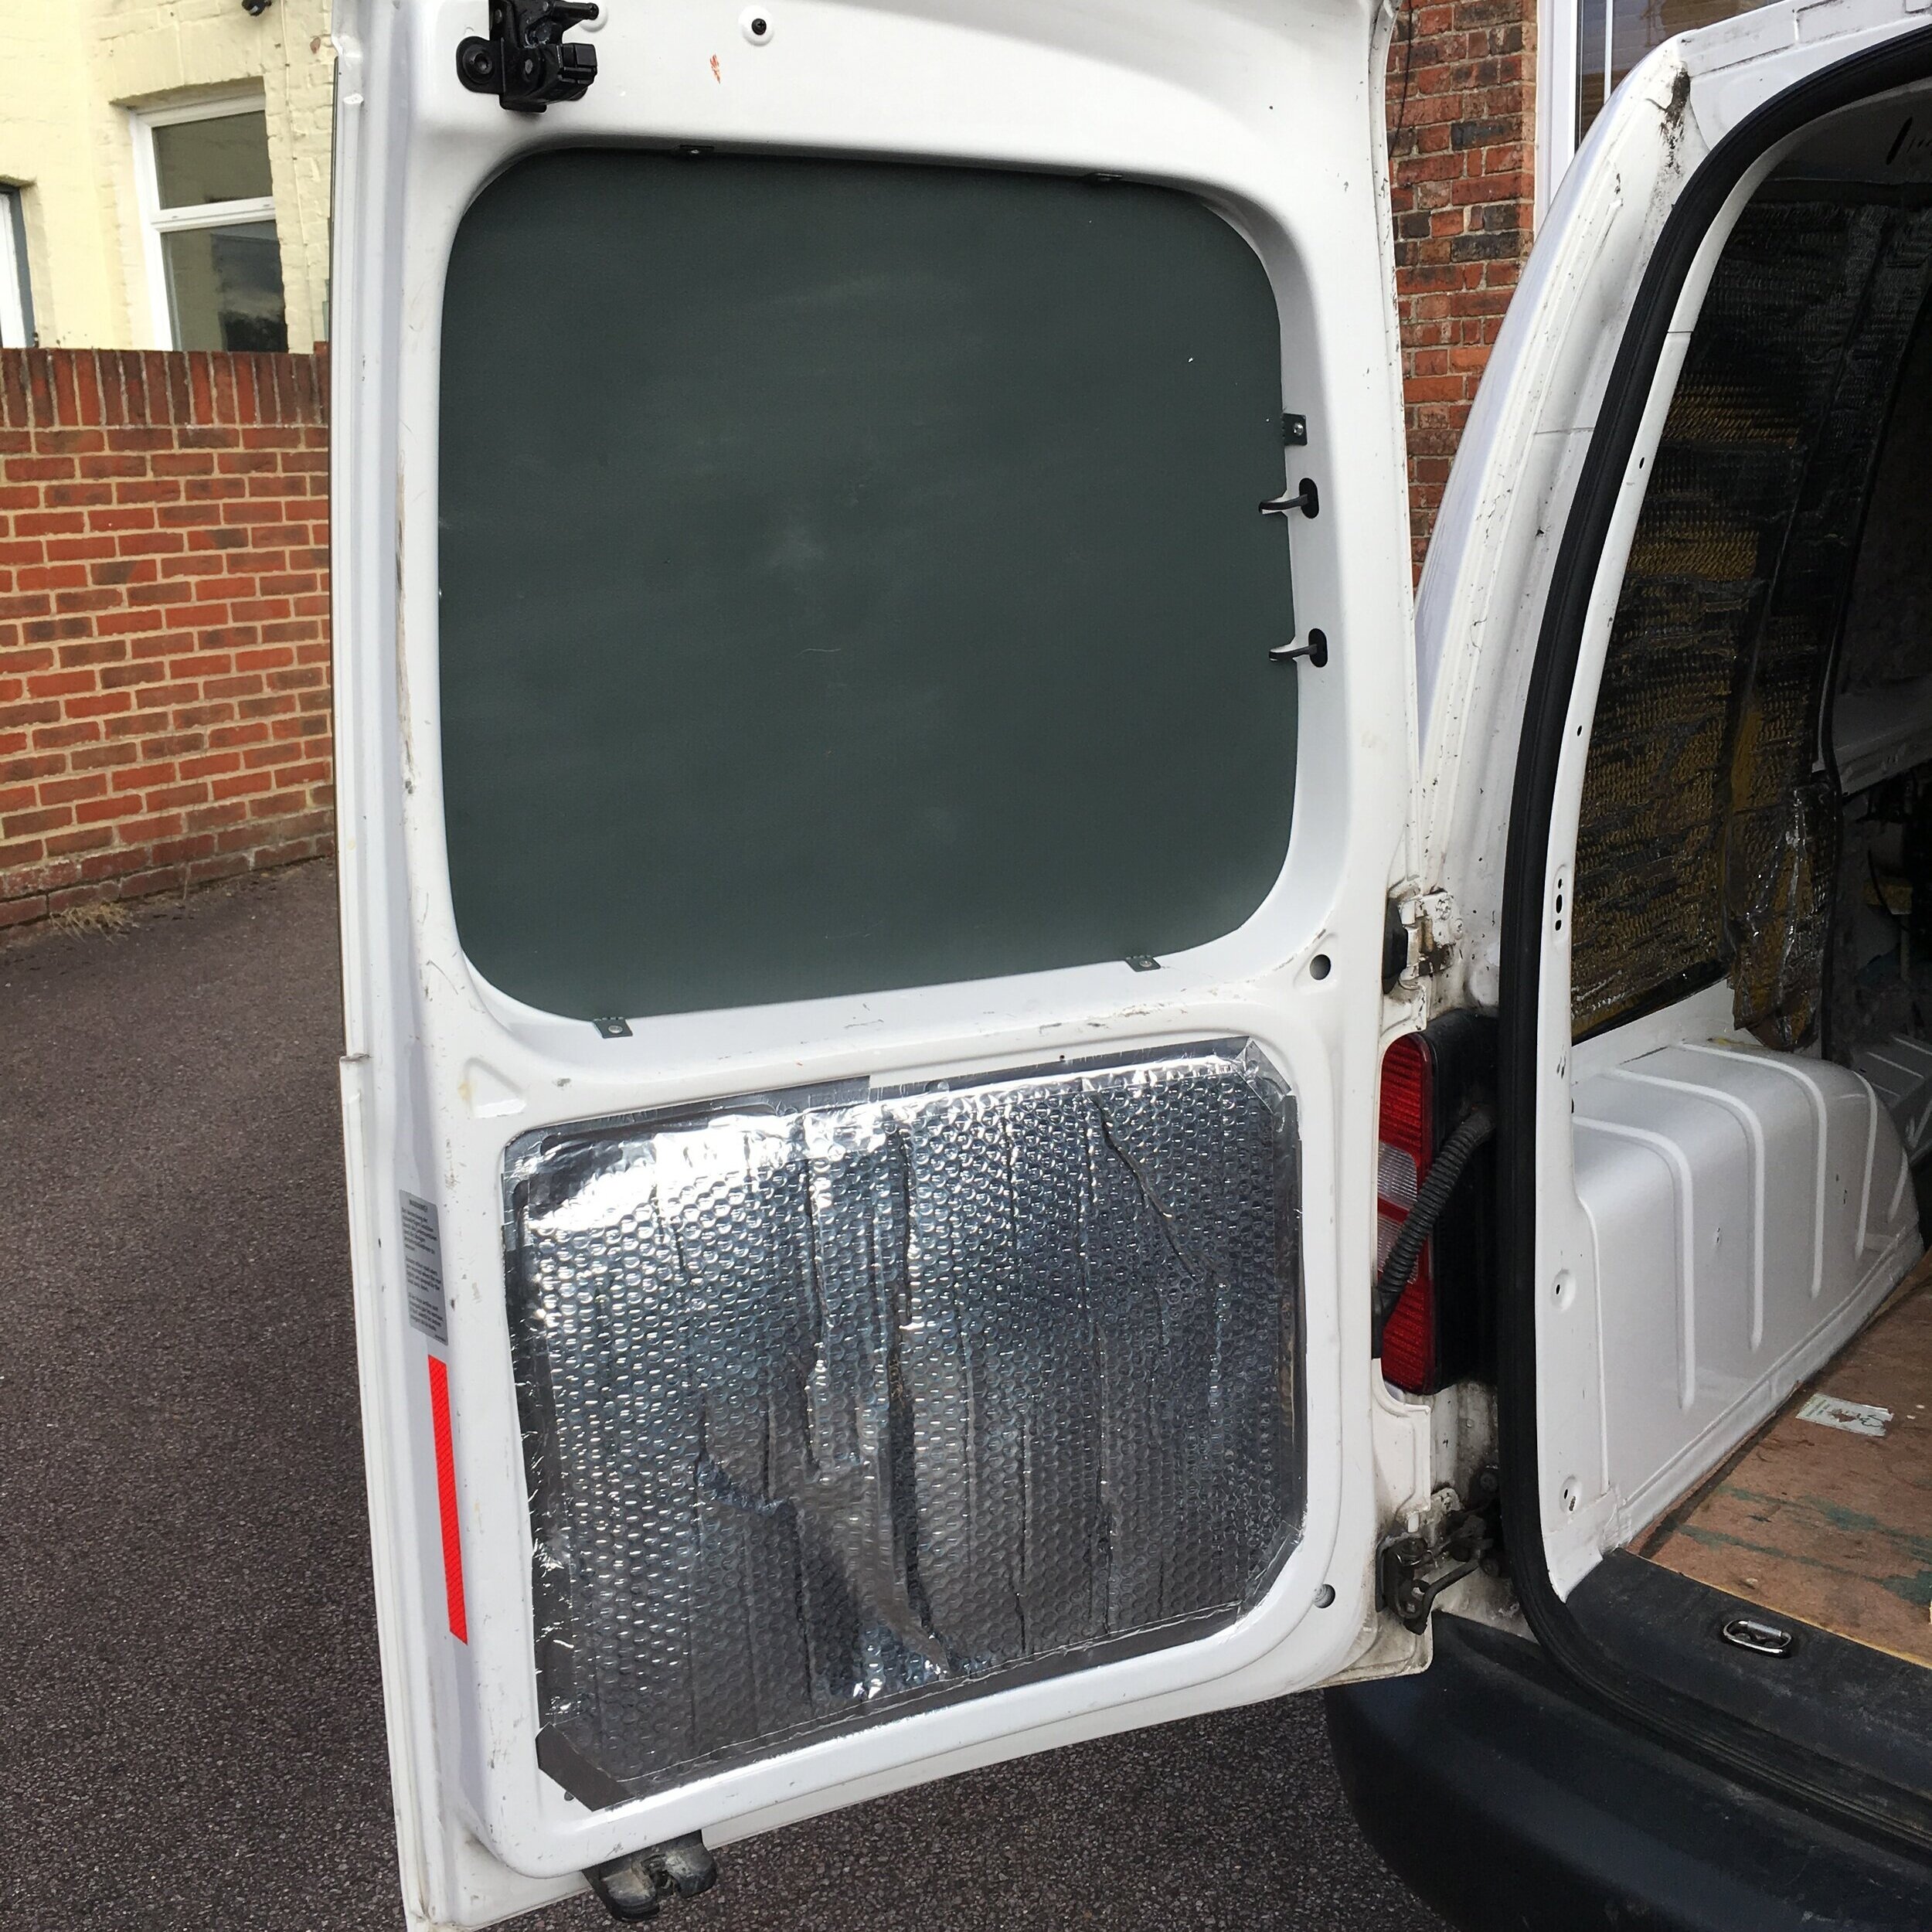
The Caddy roof was a little tricky to insulate, but I used the spray glue to carefully stick sheets of Thermawrap up there, being careful not to interfere with the interior light wiring. As you can see on the right of this picture, I have not used the Thermawrap bubble insulation. This is because I decided to use the bubble wrap insulation on the inner side of the large van plywood panel as opposed to trying to stick it over the recycled plastic, you can see this in first the video above.

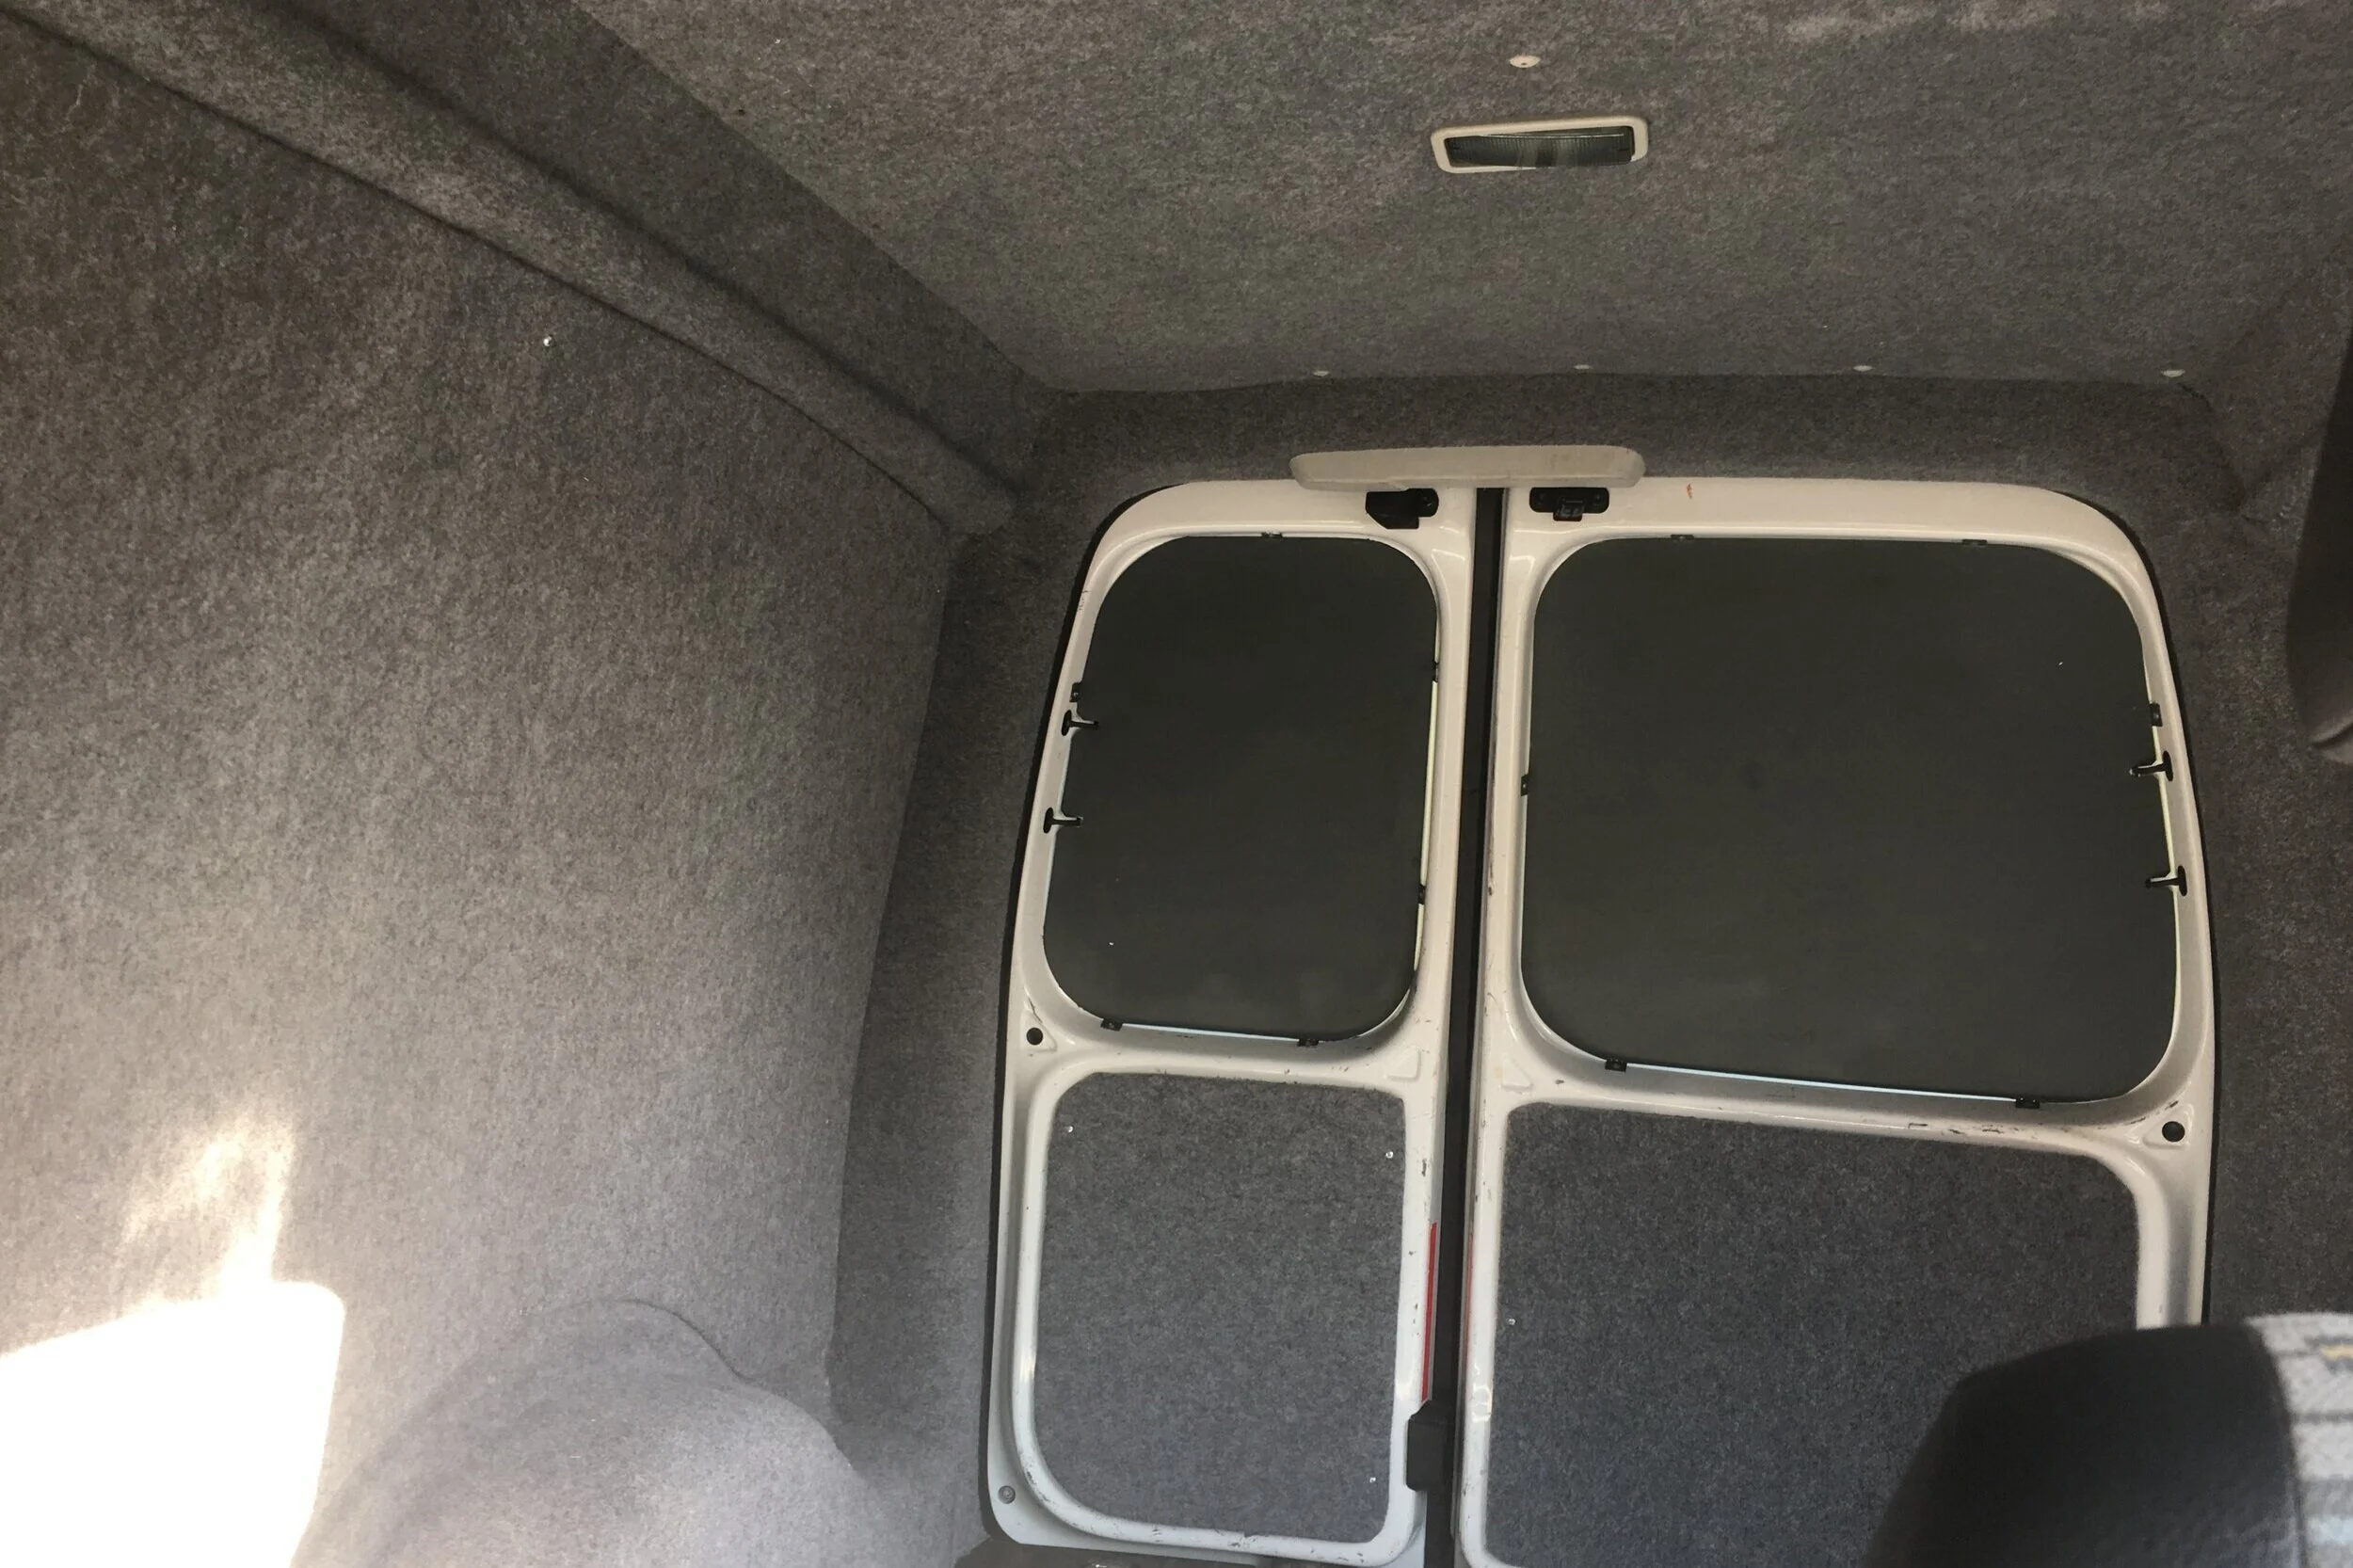
Once I was happy with my insulation, I started carpeting the plywood panels and re fitting them. I started with the small van door panels as if it all goes wrong you don’t waste too much carpet etc. I used the stock trims to get a shape for my ply lining and basically just drew around them and cut them out. For the larger ply lining in my caddy, it was really just a case or trial and error. I kept making small changes to the ply and re fitting to get it to sit exactly where I wanted. You can purchase complete Caddy ply lining kits online but these are quite expensive when you are on a budget!
Carpeting the ply wood is actually really easy. You can see exactly how I did it in the videos. But in general I found laying the carpet over the plywood and then sticking one half on with the spray glue then folding it over and sticking the other half was my preferred method. There are loads of guides on Youtube on carpeting the panels so its easy to find what works for you. Note that the carpet does have a ‘show' side and a ‘stick’ side… Basically once side is more fluffy!
Attach the plywood using self taping screws, again because I had the Caddy van with ply lining already in I could reuse some of the holes. Just BE CAREFUL that you are not going to drill through something you really don’t want to, just double check every fixing point.
Sometimes the screws tried to wind the carpet around them and stretch it off the plywood. this only happened a couple of times but I heated the tips of the screws with a lighter to melt through the carpet and make a kind of pilot hole to avoid damage to the carpet.


The picture above shows the rear of the carpeted roof, this was the original roofing panel that came with the van. I have included this as it shows how I had to carefully cut the carpet to allow for the trim clips to re attach it. The trim clips in the VW Caddy are really short which basically means theres not a lot of room for the new carpet, so just bare this in mind and try to keep overlapping carpet to a minimum when working on the roof.
Carpeting My Bike Van Wheel Arch
Next came the most fun part of my bike caddy camper conversion… The carpeting of the bare metal! Prior to the caddy van I was a complete beginner at interior carpeting, I have actually now gone onto carpet another caddy van for someone, but I learnt a lot here!
The main bits of advice here are:
Try to carpet in complete sections as much as possible. This is because it is quite tricky to join separate pieces seamlessly.
Don’t be afraid to un stick and re work the carpet. The carpet will actually stretch a lot and the glue takes a while before its fully gone off so you have considerable time to work the carpet. As you can see here there are a couple of creases in the wheel arch, this was in honesty the hardest bit but I unstuck the carpet after this picture and re worked it, adding a bit more spray glue, to get a proper finish.
Remove seals and rear van door latches! Removing the door seals and rear door latches allows you to simply carpet over everything, then relocate the holes under the carpet, trim off any excess with a sharp knife, then re fit the things to removed for a seamless finish!
Be patient! Ultimately you will have to put up with any mistakes in your van, so theres no harm in taking your time so that everything looks neat and tidy.

Part 2 - Flooring of My Caddy Camper Bike Van

The flooring to me was really important as more often than not I carry wet muddy bikes around. I needed something not only waterproof, but something that could be laid in as one piece so could be easily swept out and cleaned. Hence why I chose the rubber matting, it is easy to shape and is also water proof.


I started by removing the ply and covering the floor with bubble wrap insulation as you can see in the second video. I used the spay adhesive to secure it. Next I rolled out the rubber matting and offered up the flooring ply. Make sure you do this in complete reverse order i.e rubber flooring upside down and flooring upside down, otherwise when you flip it over the right way into the van, it will be the wrong way around. Also note from the picture, I added a little storage flap to the floor in my van. This is the area on the drivers side rear where the floor drops for a step so there could be another side door. I use this area to keep my Jack and tools etc.


Next I drew around the van floor ply with a pencil and just cut out the rubber using scissors. Then Offered it up in the van to ensure everything was correct before gluing it down. Next I secured my floor ply. Now I didn’t want to screw it down, as I did in the video, as it basically means drilling holes in the floor of your van! There are simple ways of securing floor ply without screws i.e glue, but unfortunately my Caddy already had the floor screwed down so I just re used the screw holes… Damage was already done!
You can see from watching the second video above how I glued the flooring. But I basically just used the left over spray adhesive. Its a good idea to cover some of the fresh carpet incase you get a bit excited with the spray glue!
Making my Caddy Extras
Bike Axle Stands

I have used a bike axle stand so I can securely transport bikes in my Caddy by removing the front wheel and using the axle to secure them. I have covered how to make this in another blog entry HERE.
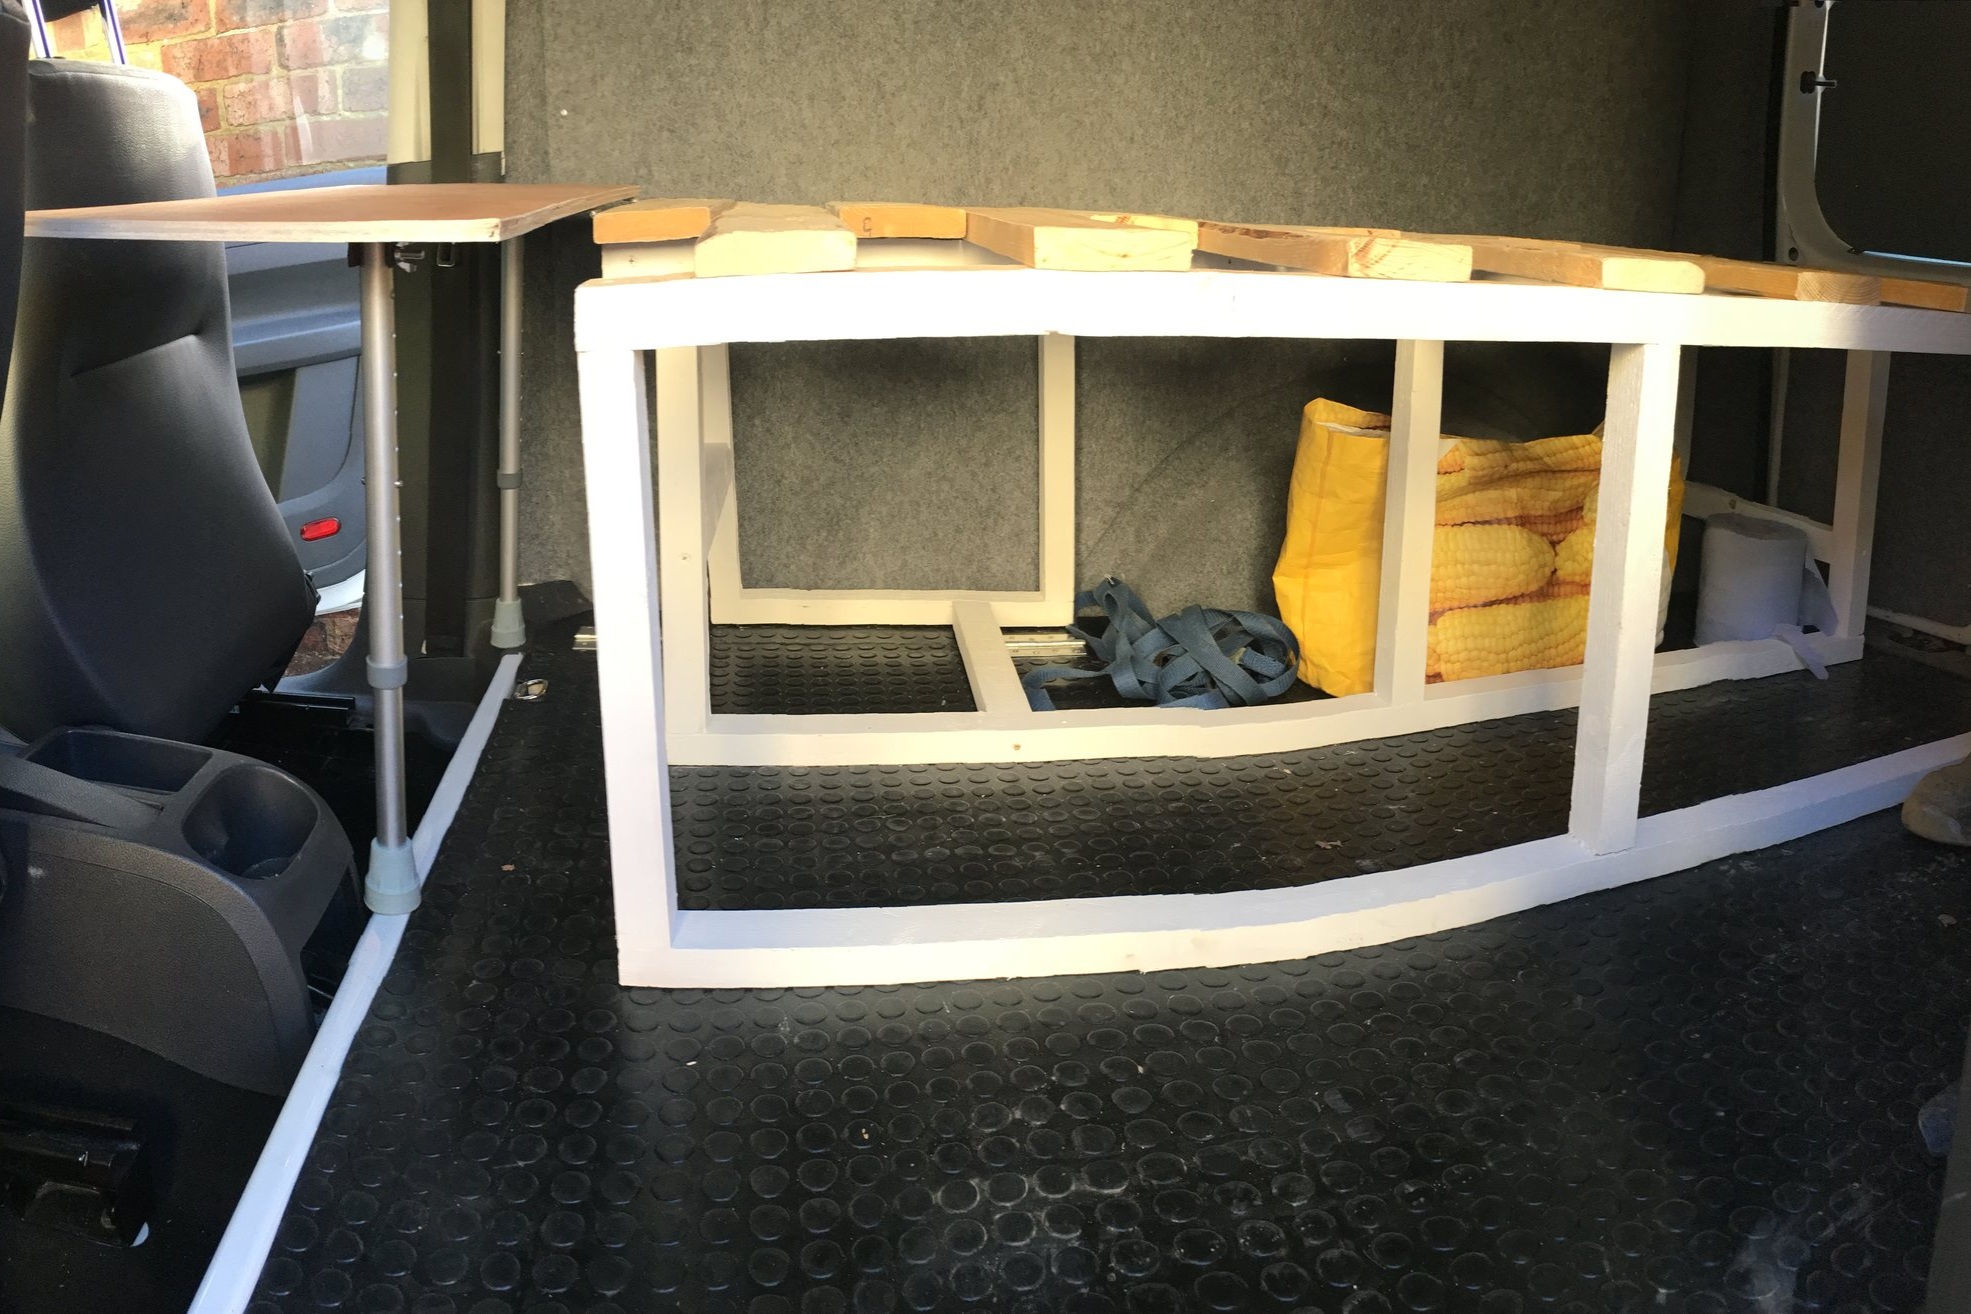
Wheel Arch Box
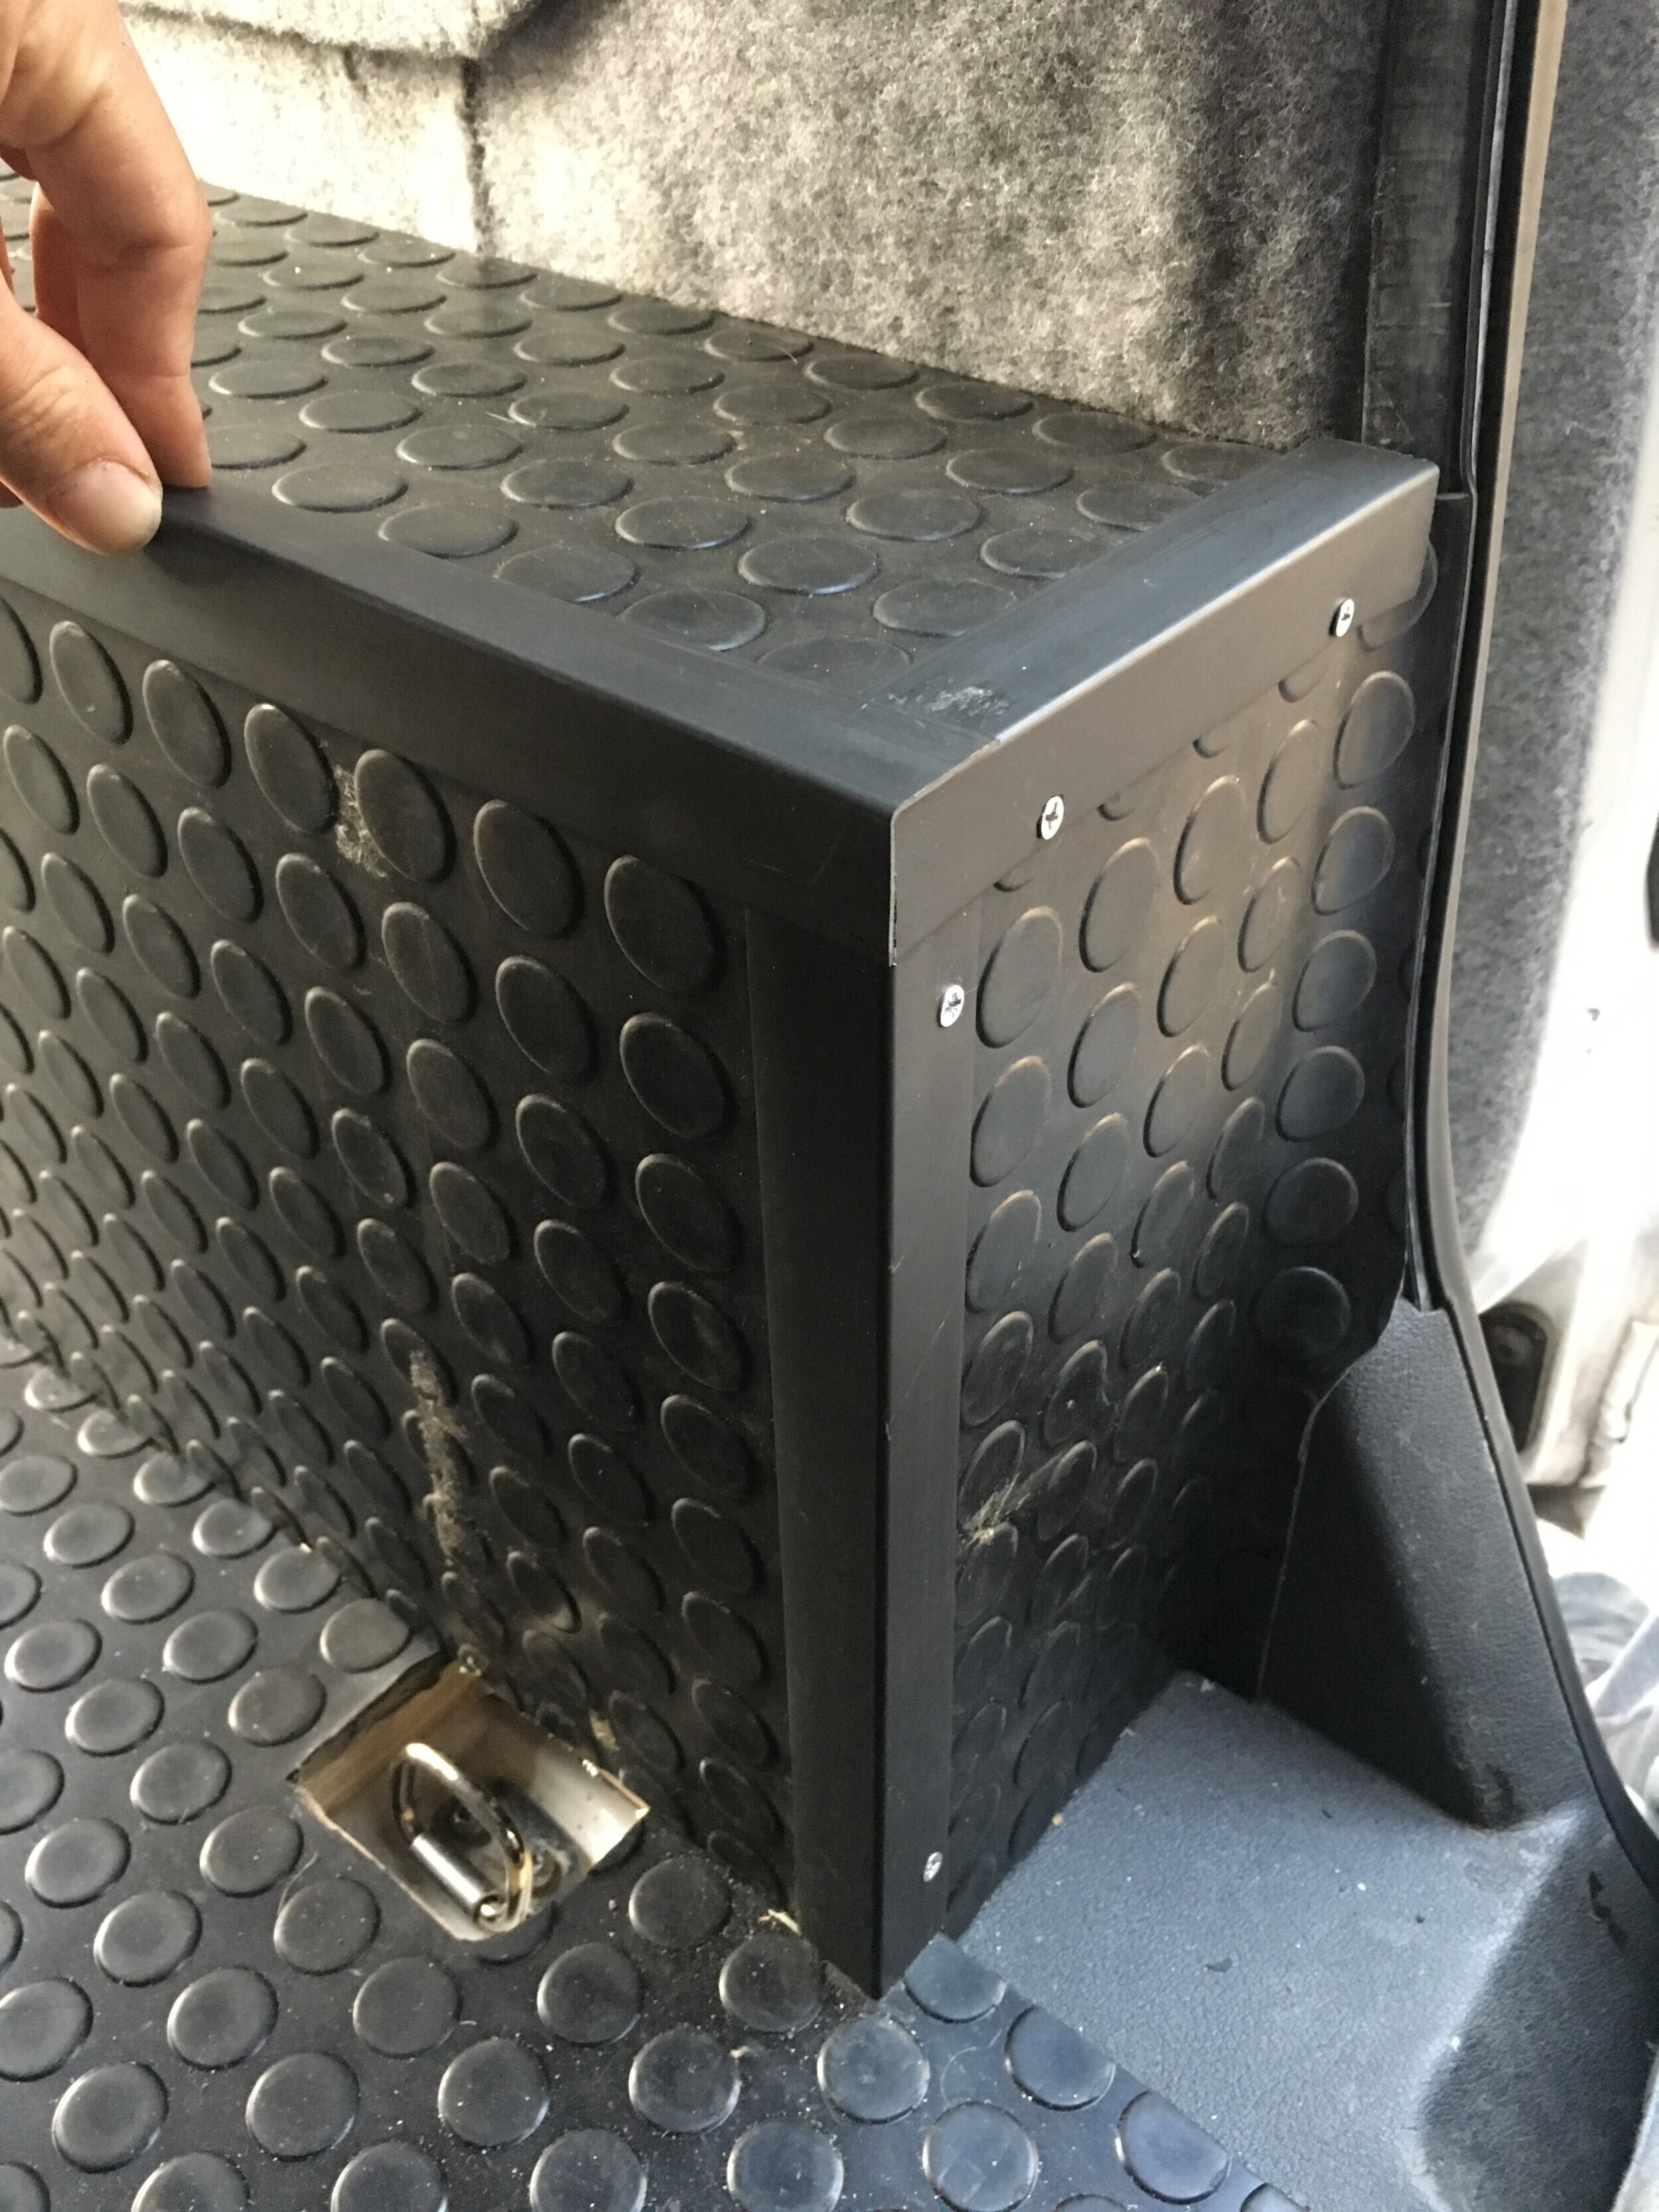

From the off cuts of ply, I made a box to cover my left hand side wheel arch. I covered the box with the same rubber matting as the floor and finished it with some black plastic trim strips that I found in a DIY shop. This box doubles up as a tool holder with some magnetic tool strips and clamps that I screwed on.
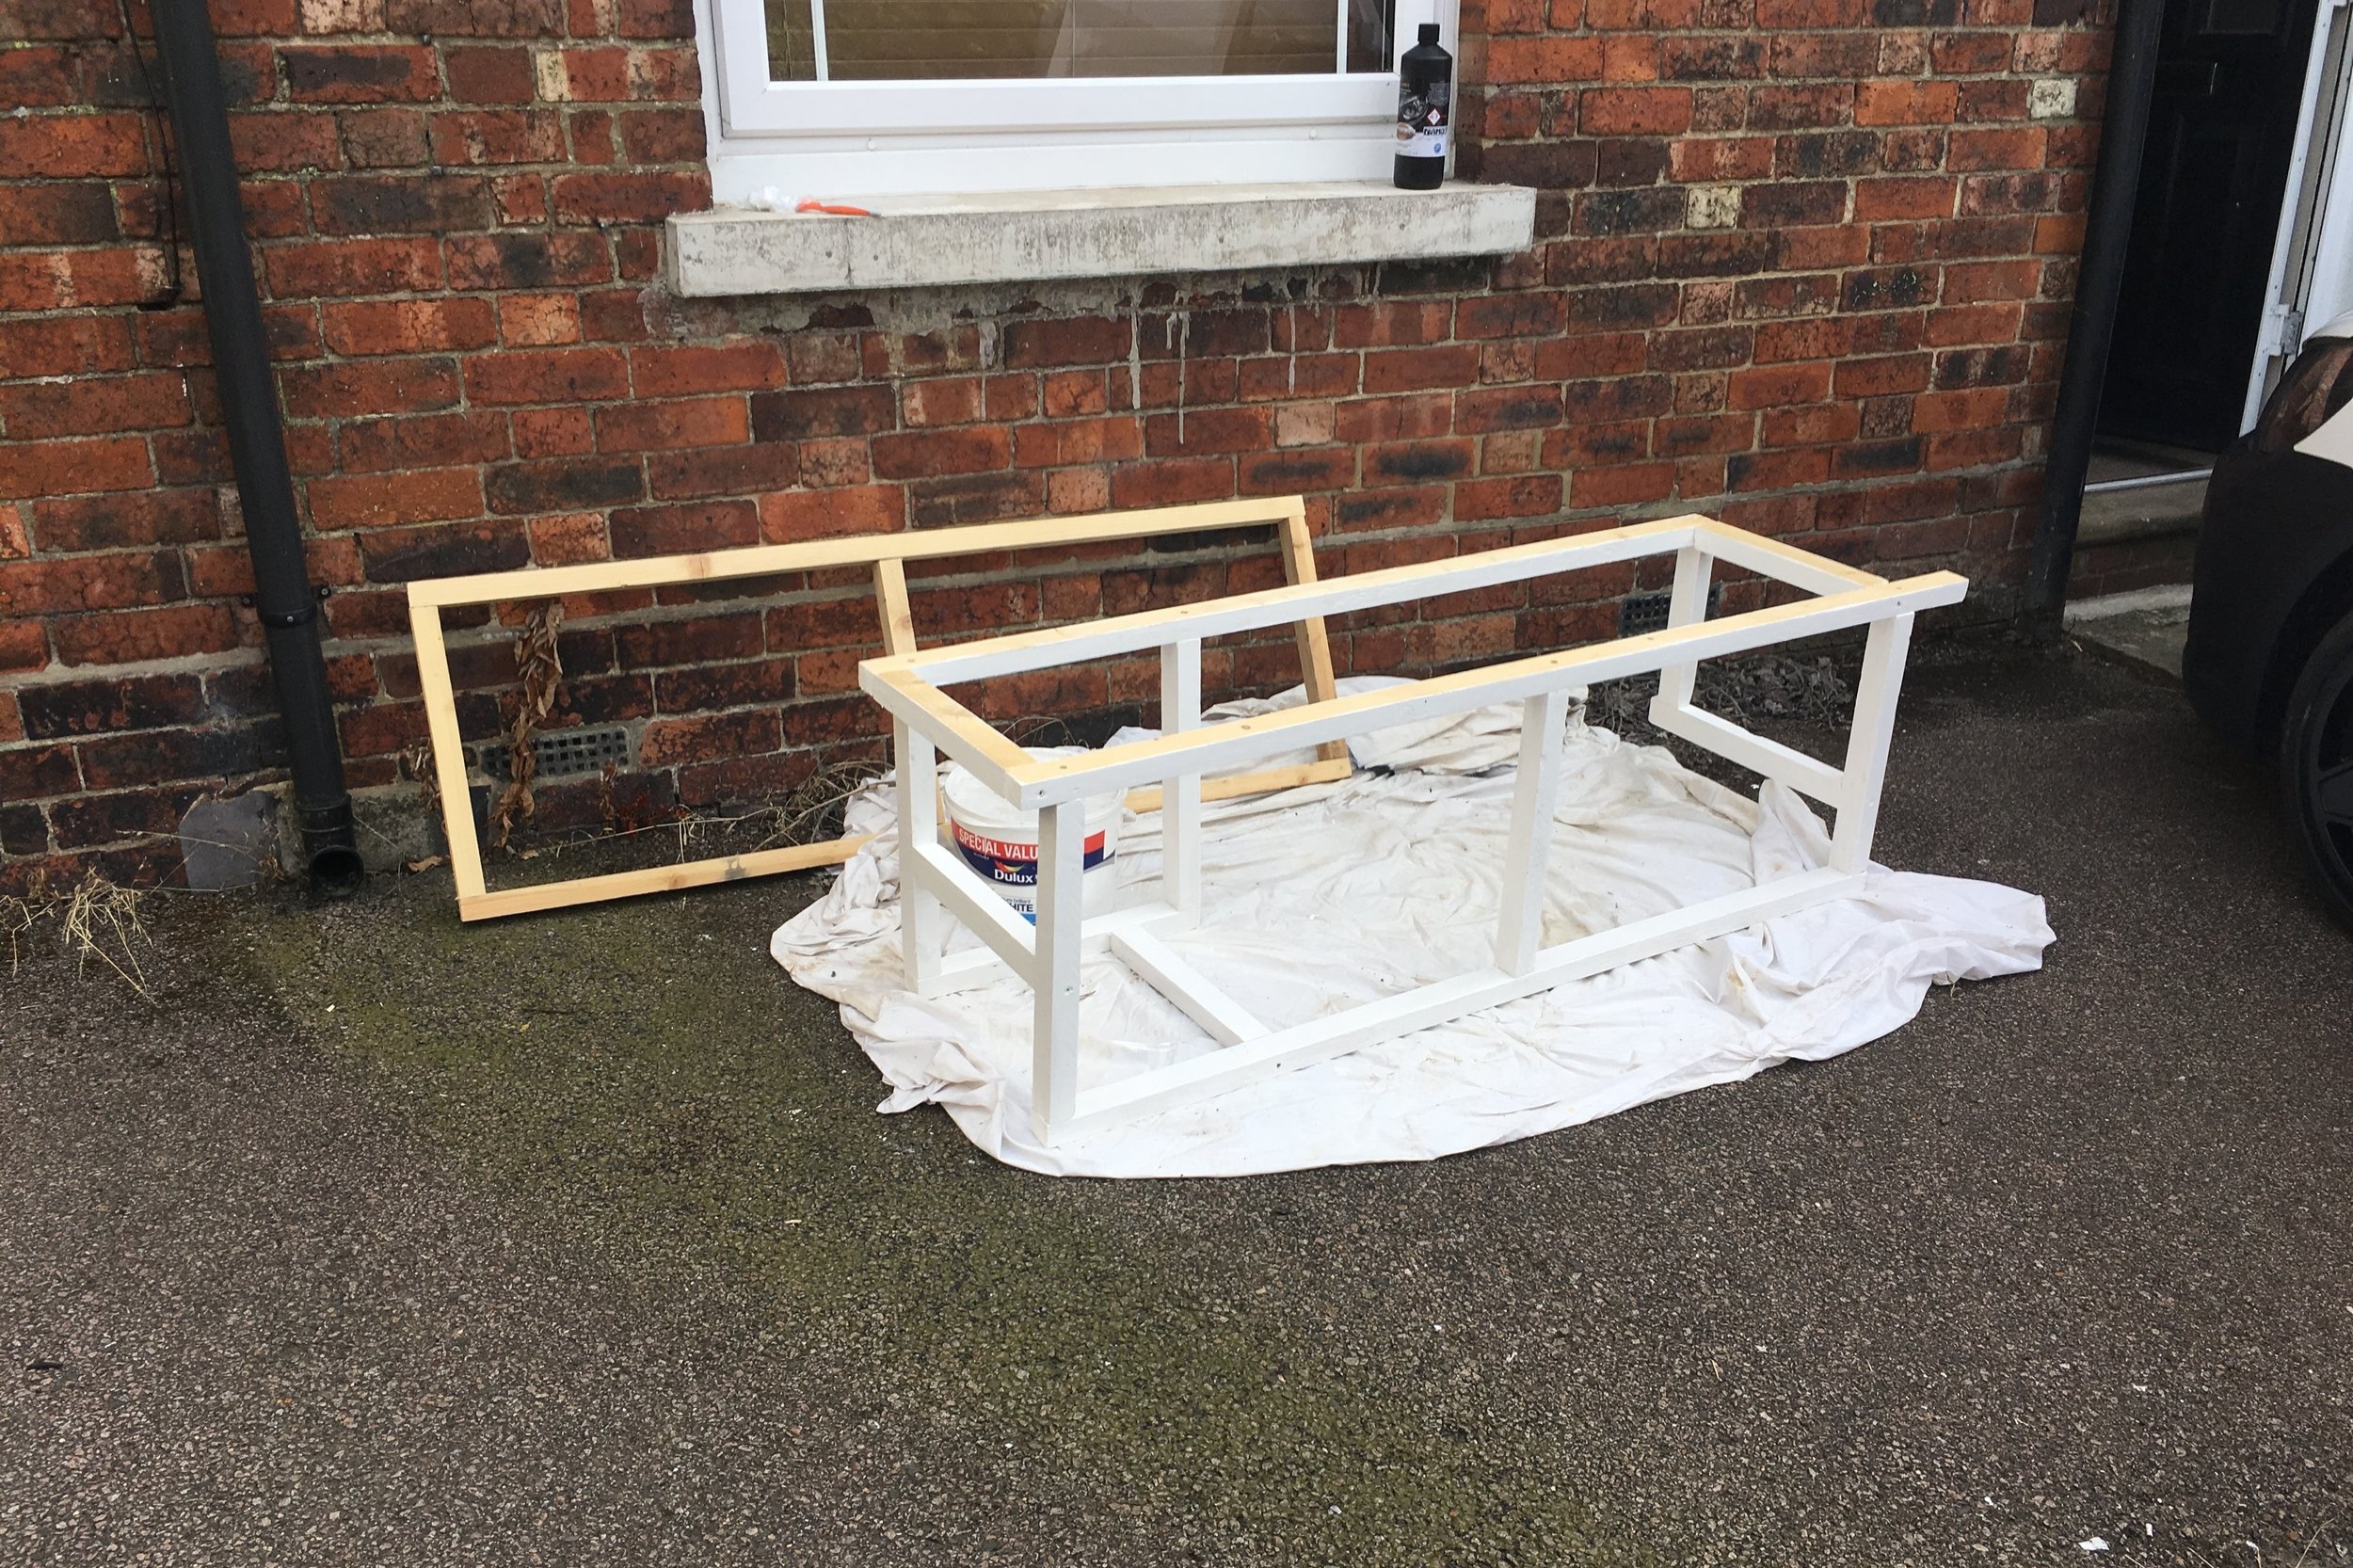
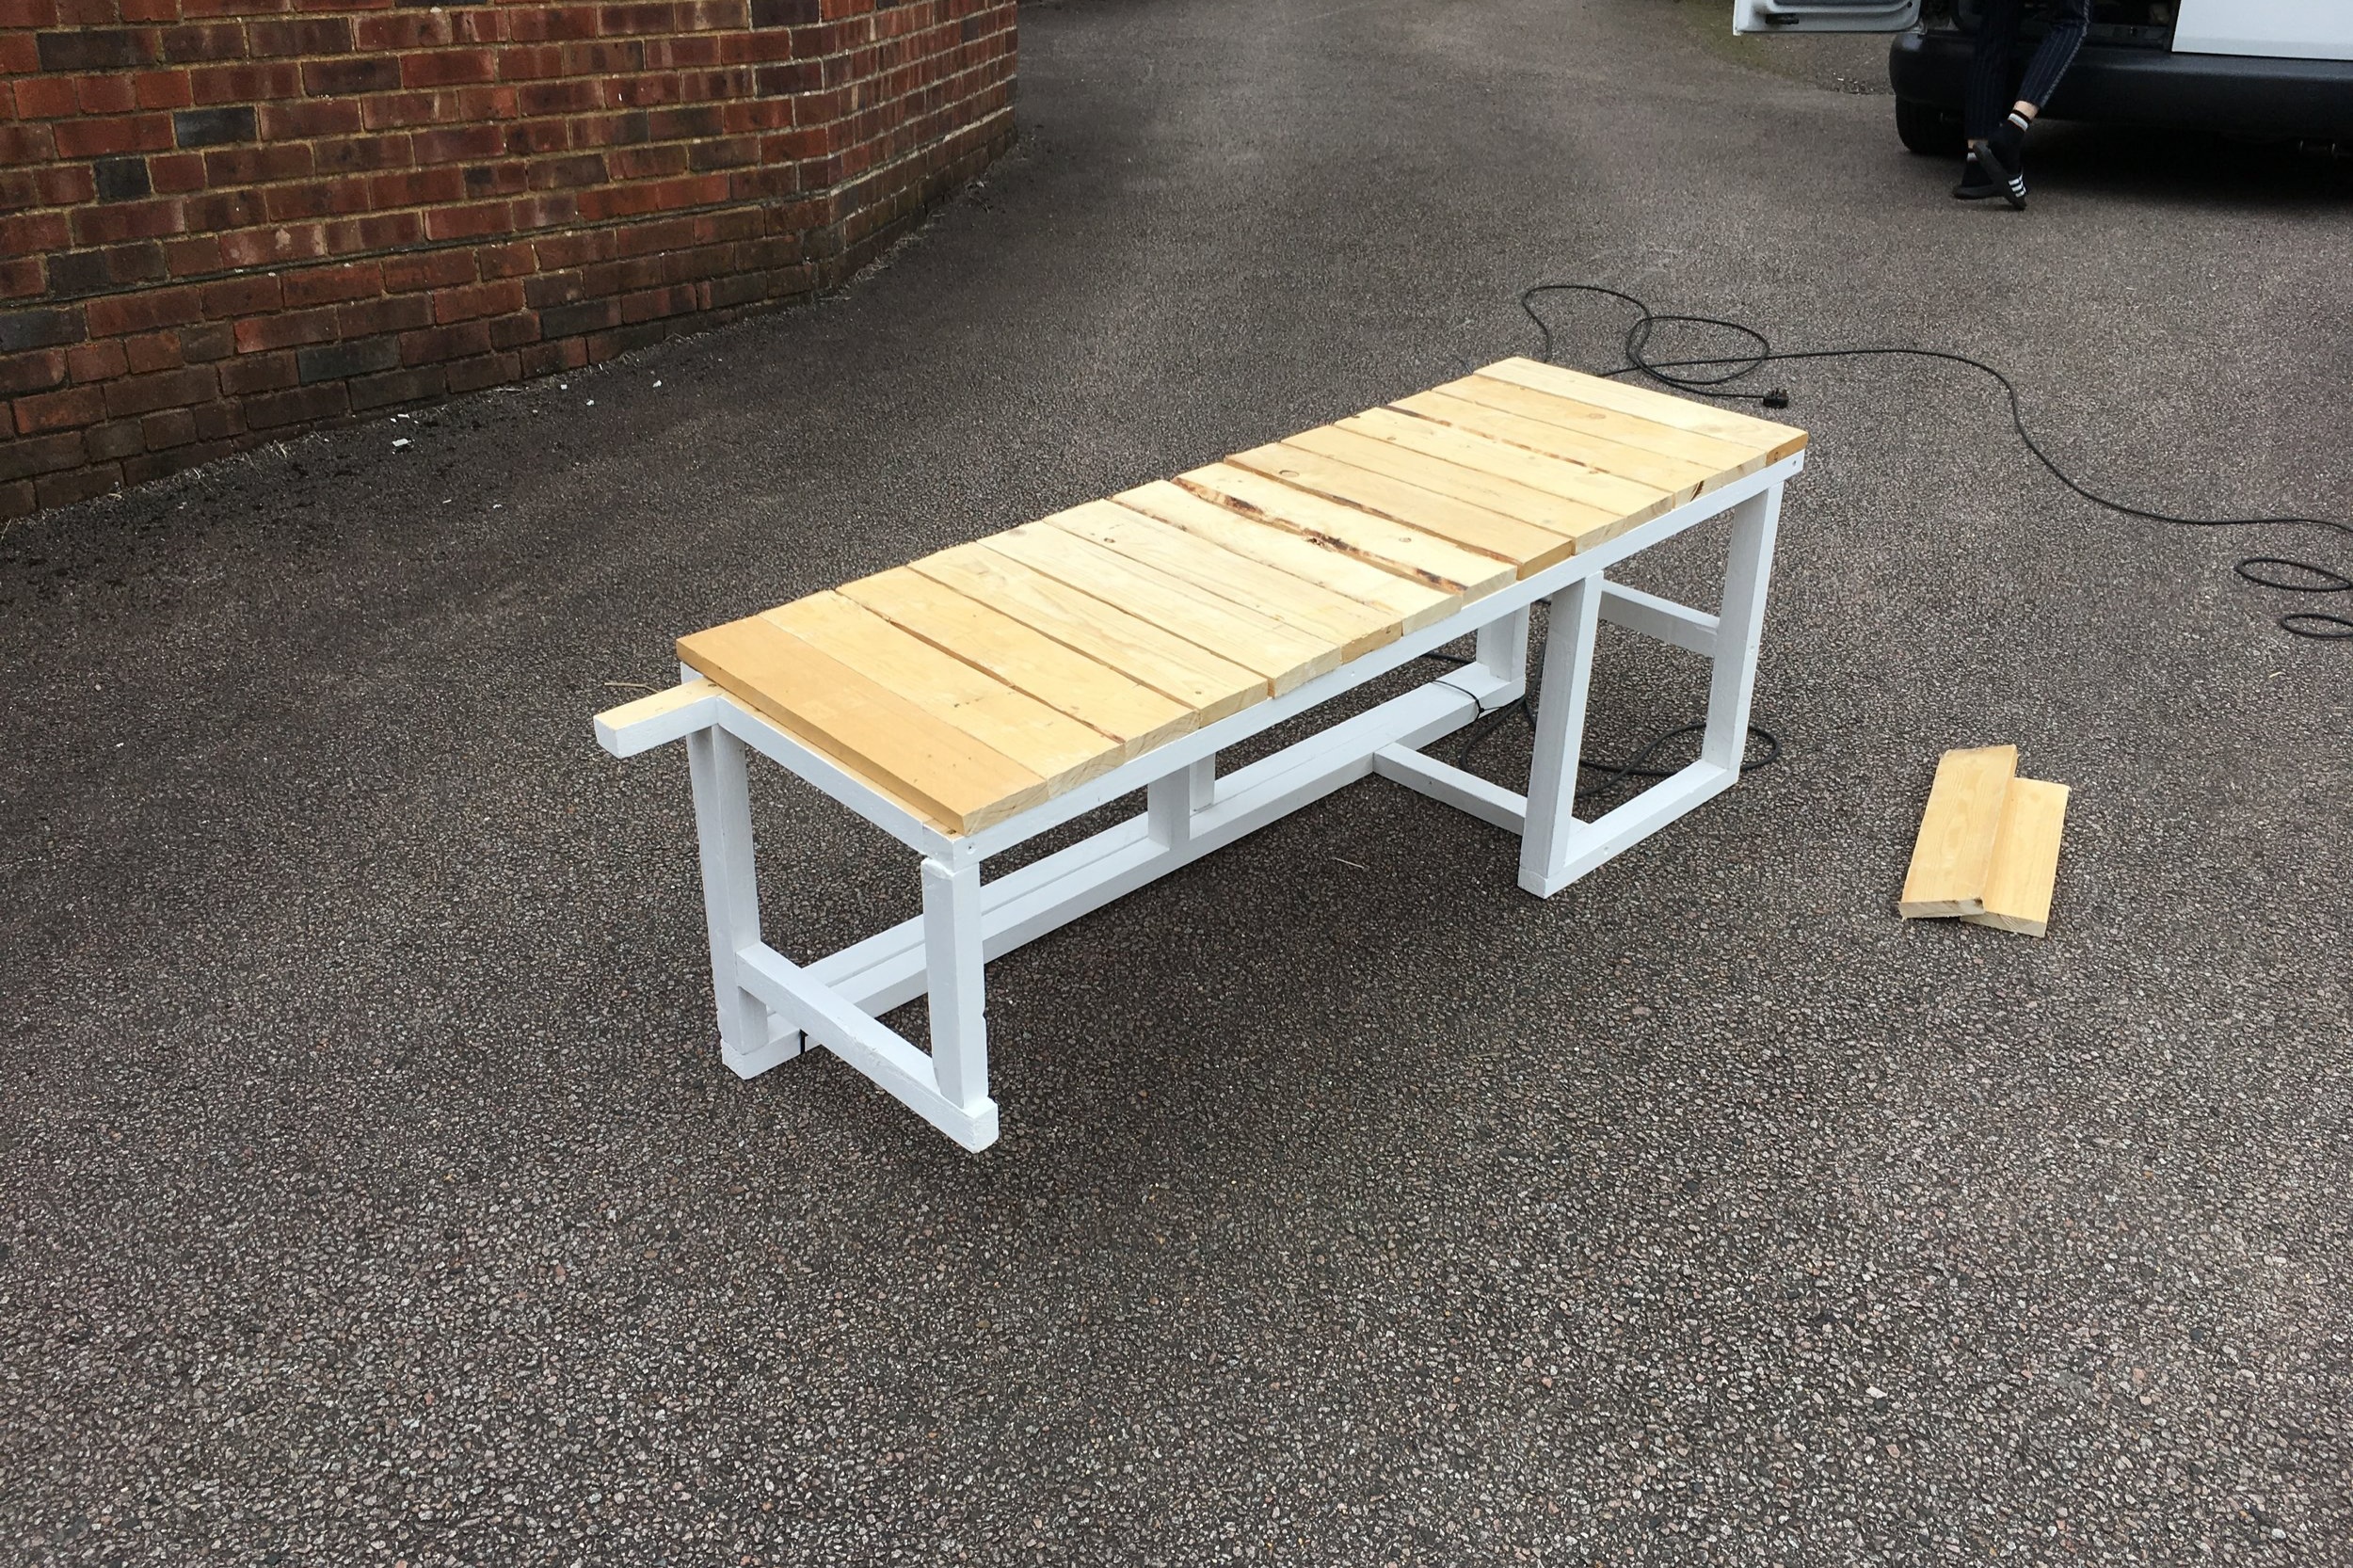
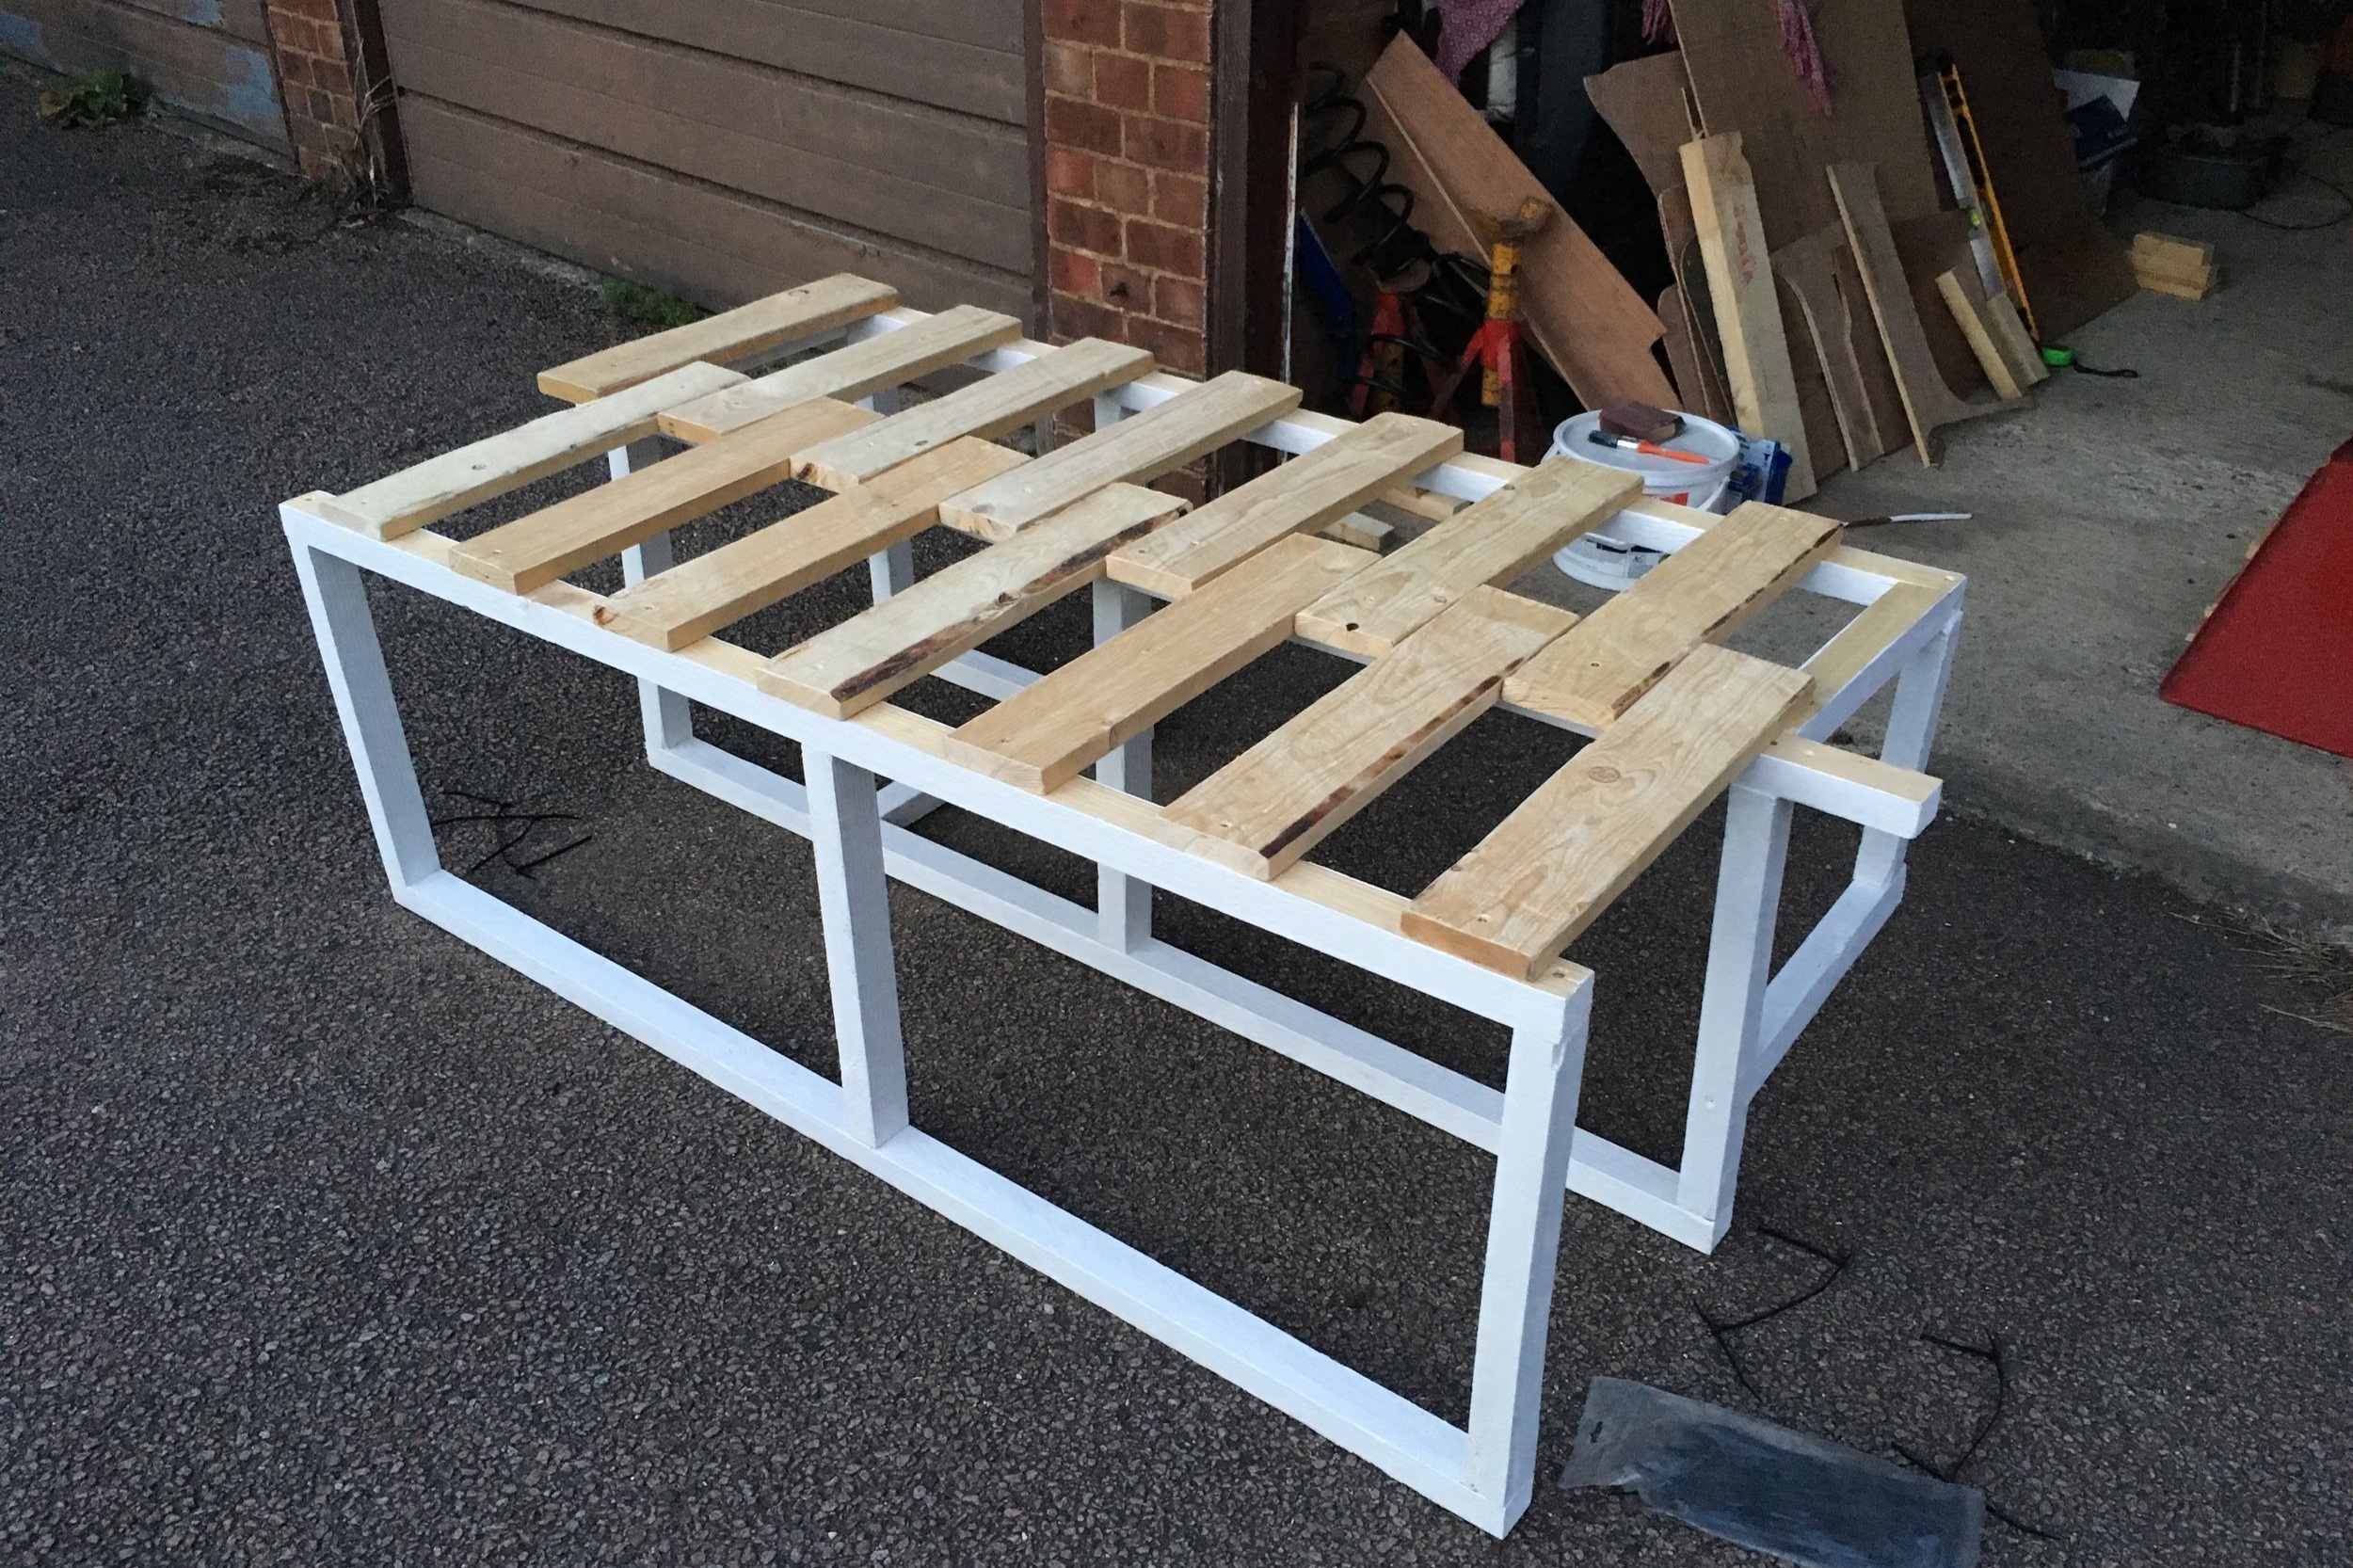
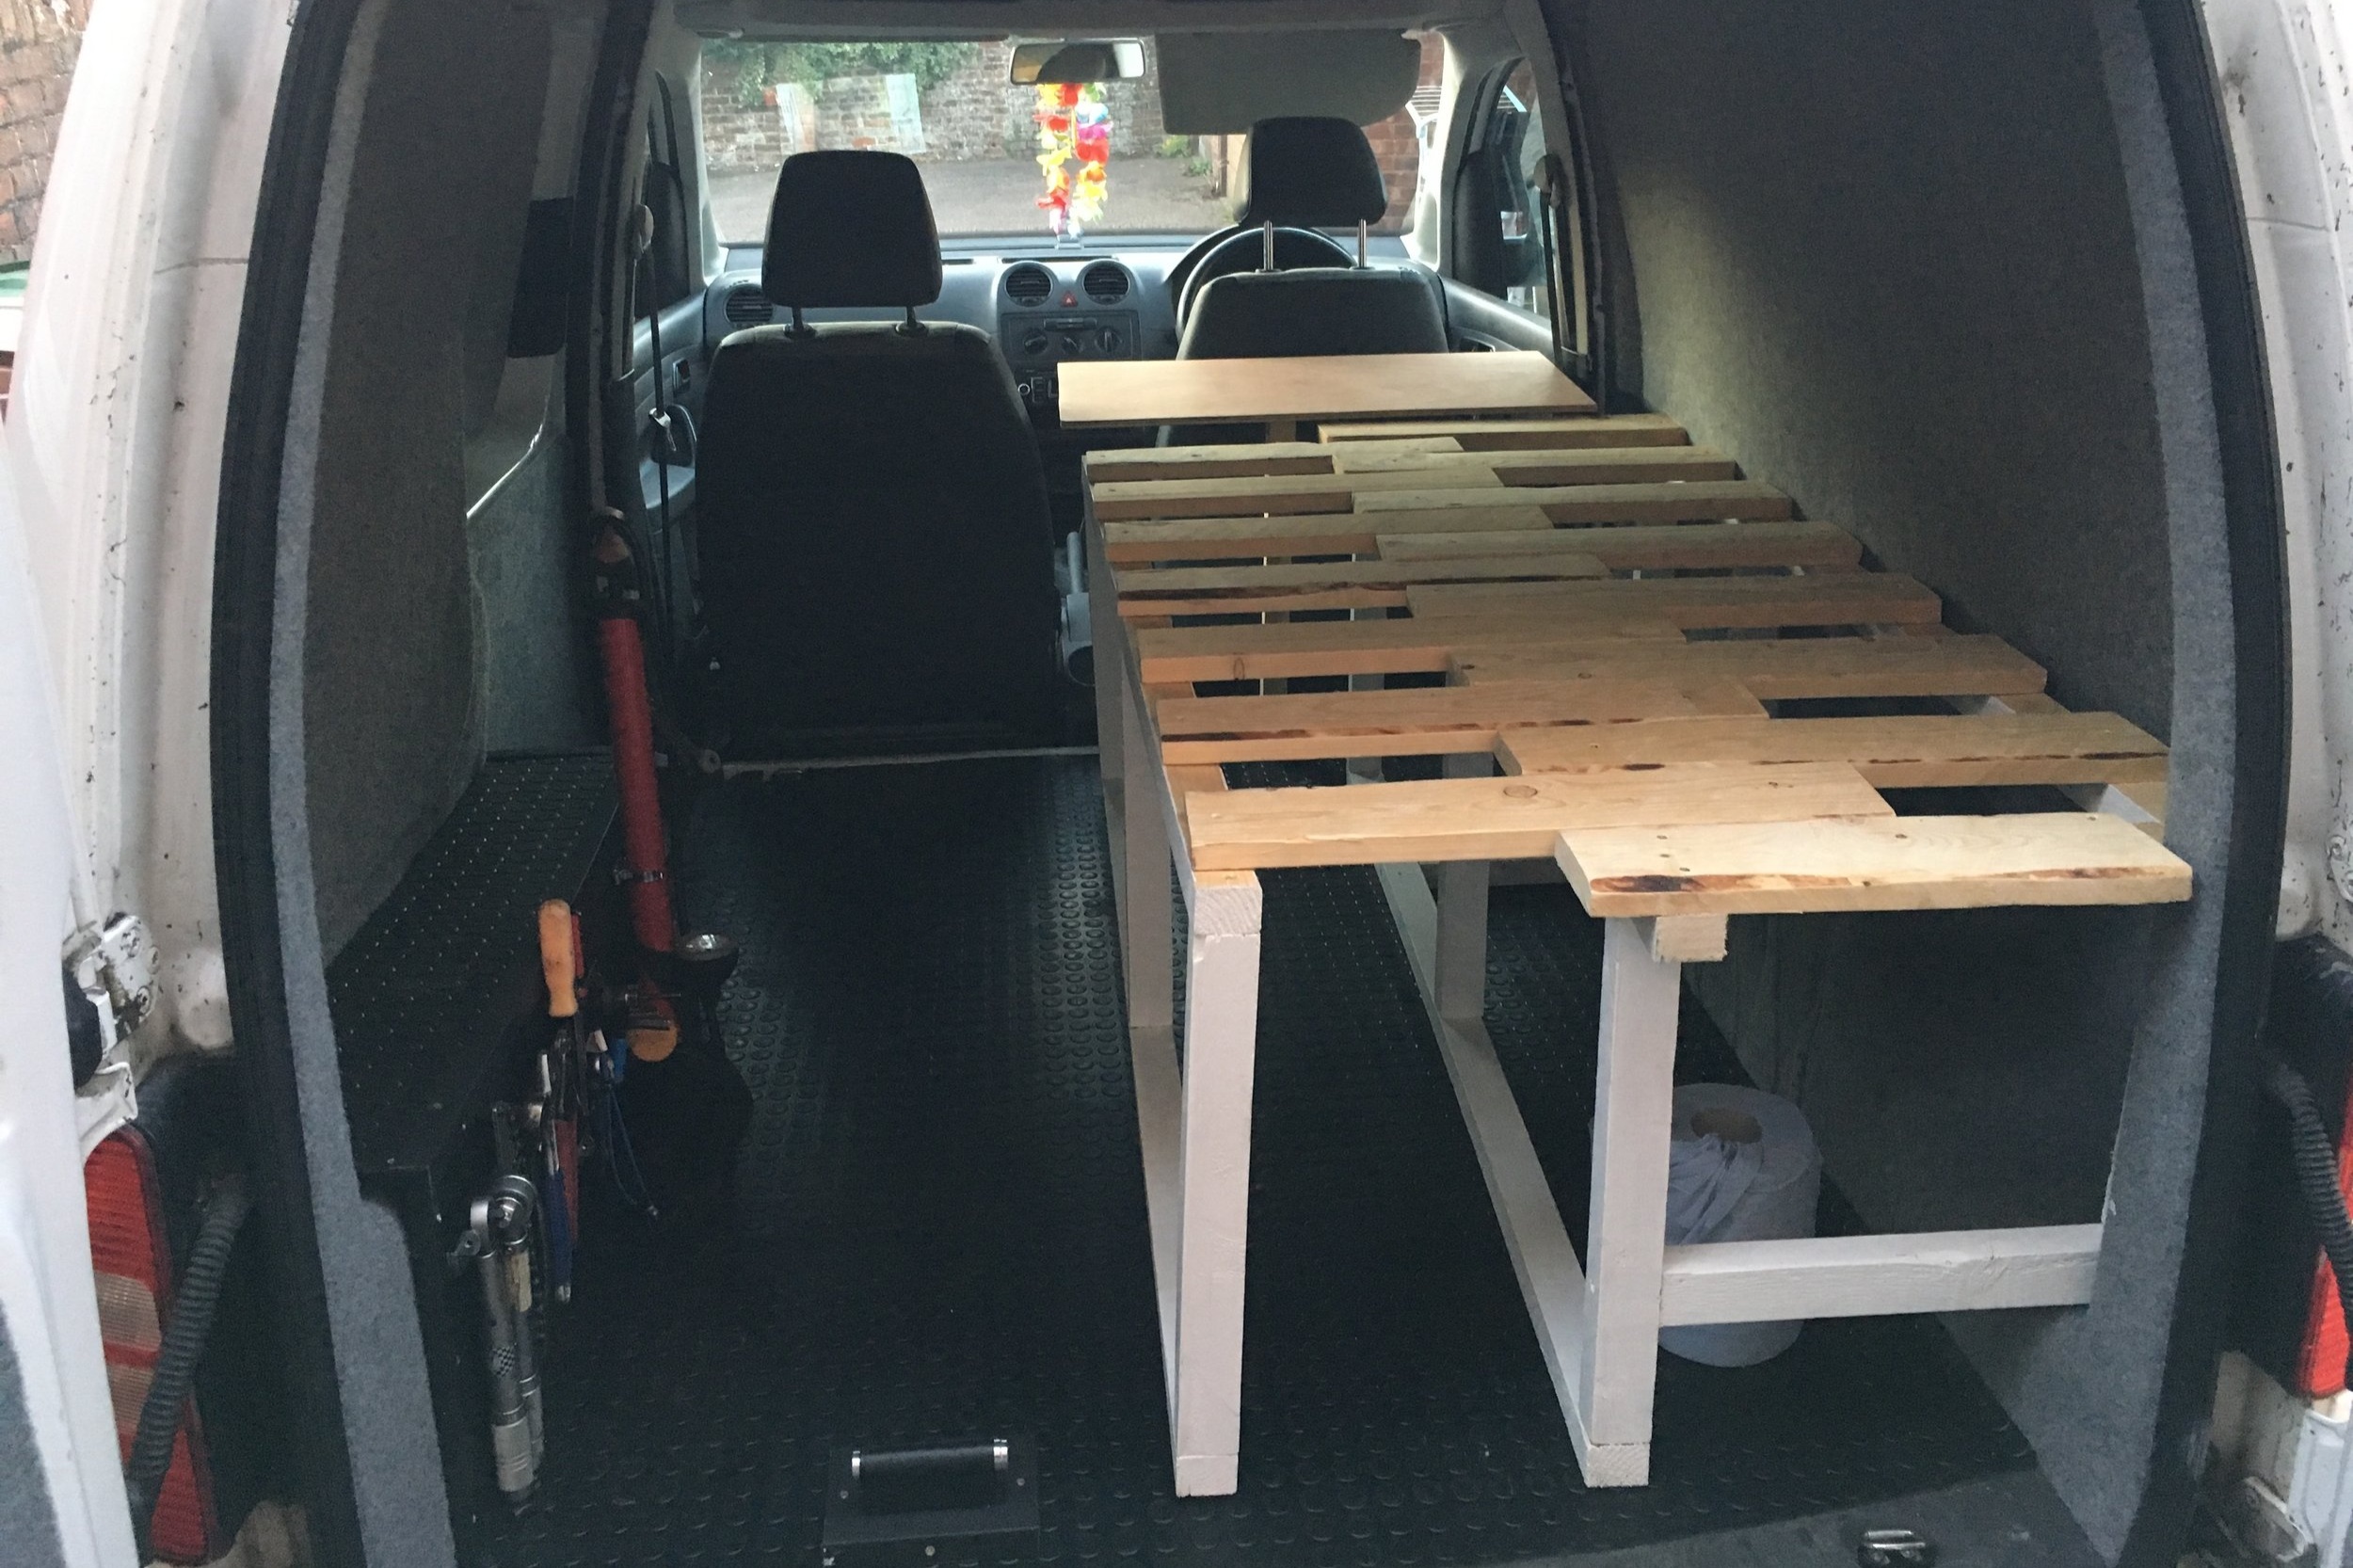
Slide Out Van Bed

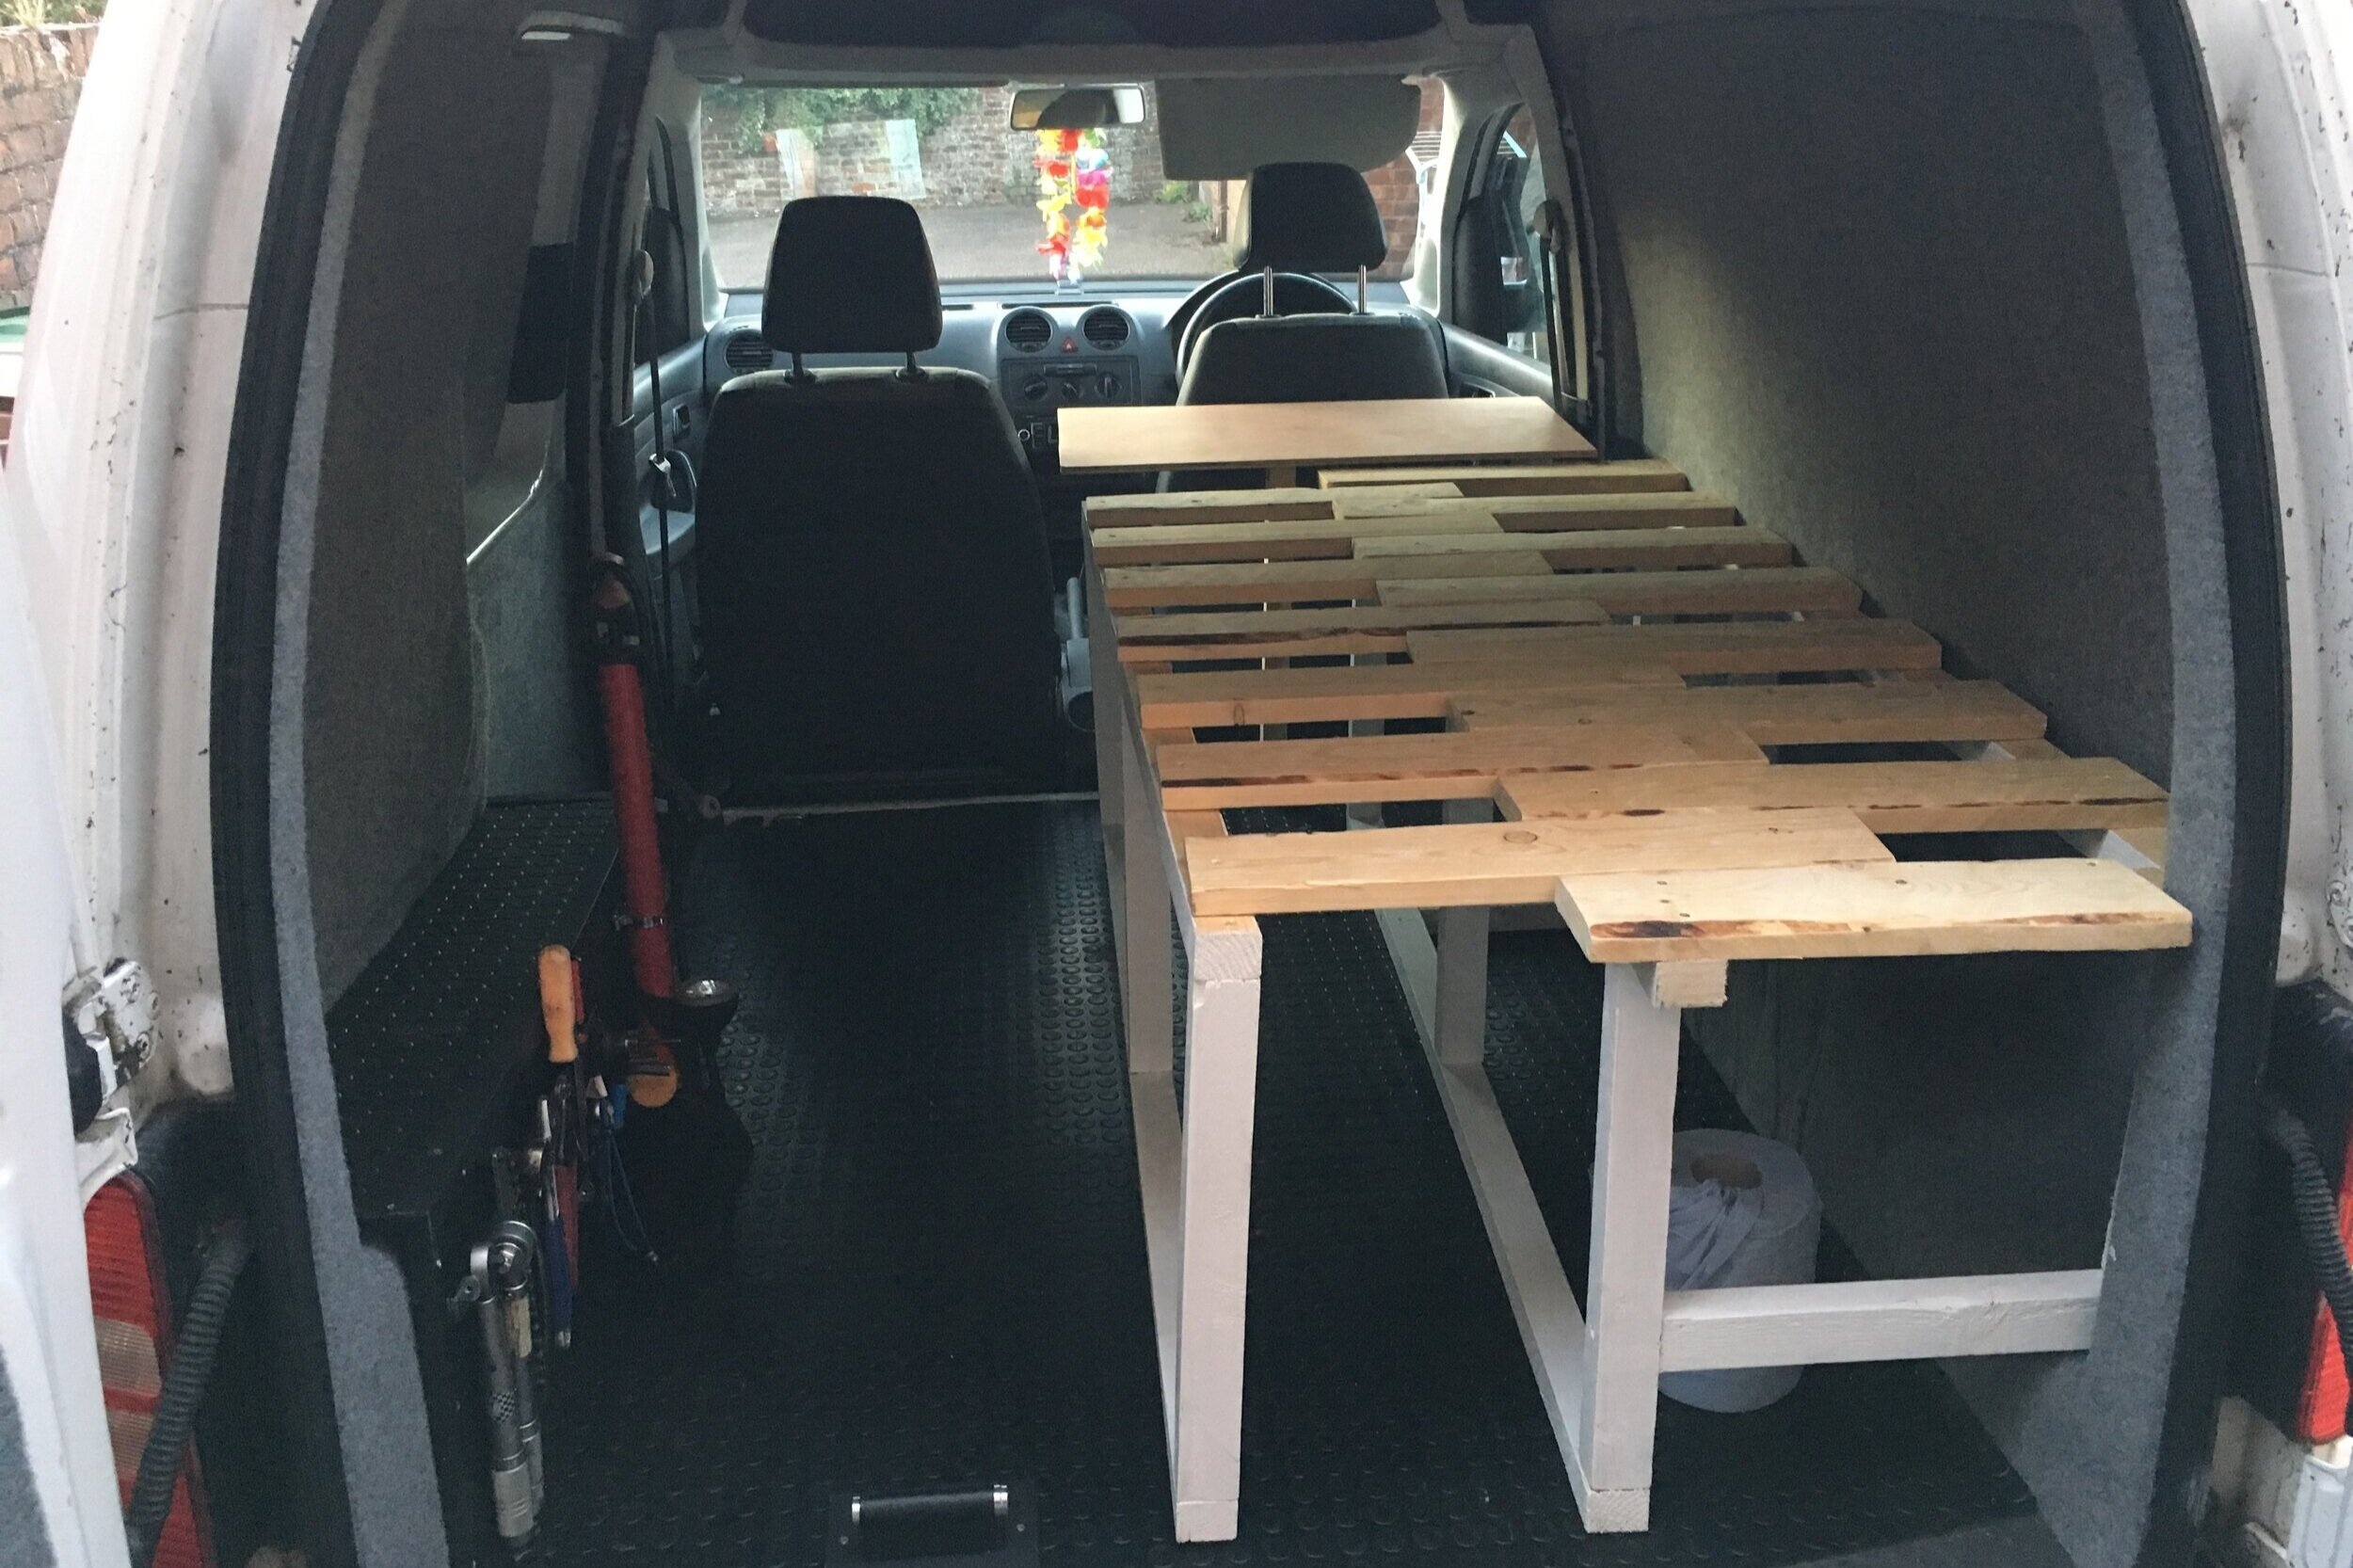
So ultimately along with working from the van, I wanted to be able to use it to sleep in while travelling around riding and racing my bike. I used Pinterest to get inspiration for the design but I also had to design it around the things I wanted to store underneath it i.e my tool box and bike washer. In an ideal world the bed would be lower down, but had to compromise with it being a small van. I have travelled to the alps for a month in my van, carrying 2 bikes and sleeping in it everyday… It’s only small but does the trick!

Enduro bike + DH bike and bed away… Slides out to meet DH bike!
Below is a slide show of the progress making my slide out VW Caddy bed. There are so many designs for pull out beds and fold out beds for VW Caddy vans, but I found this to be the system that works best for me. Obviously I have bikes in there so it has to be easy to put up and put away. Note I haven’t actually fixed the bed so it it totally removable from the van! The rubber flooring is quite grippy so it doesn’t move at all while driving even when unloaded.

I have learnt so much from owning my VW Caddy and converting it into the bike / camper that it is today. It has not only been a work van for me but also a hobby! Hopefully this blog gives you some inspiration for your own vanlife project. Thanks for reading please feel free to ask any questions via the contact or social media pages.

