
How To Fit A New Shimano Zee Hydraulic Disc Hose | With Kit Provided
Anything involving hydraulic brakes can be a bit of a daunting task! You get used to the ‘perfect’ bite point and just change the pads once in a while, for many modern hydraulic brakes are a bit of a fit and forget affair. With modern bikes often using internal cable routes, changing a brake, especially a rear brake, can be a bit of a task. Luckily Shimano have made things very easy by supplying dedicated replacement part packages which include every thing you will need and in my opinion are the best option when it comes to maintenance.
Here we show you how to change a Shimano Zee disc brake hose. The rear brake was being fitted to a longer frame so a longer hose was needed. to reach the lever.

You Need for shimano zee hose replacement:
New Shimano Disc Brake Hose (rear) includes olive, barb, seals and hose grips
Allen Keys
8mm spaner
Descent Pliers
Cable Cutter (ideally disc hose specific but any cable cutters should work)
Shimano Bleed Kit and Mineral Oil
Replacing your hose


Firstly identify the hose to calliper connection bolt and ensure that your new hose matches the old one. Note it is good practise to remove your disc brake pads, I was going to replace the pads anyway so just left the old ones in for the most part.
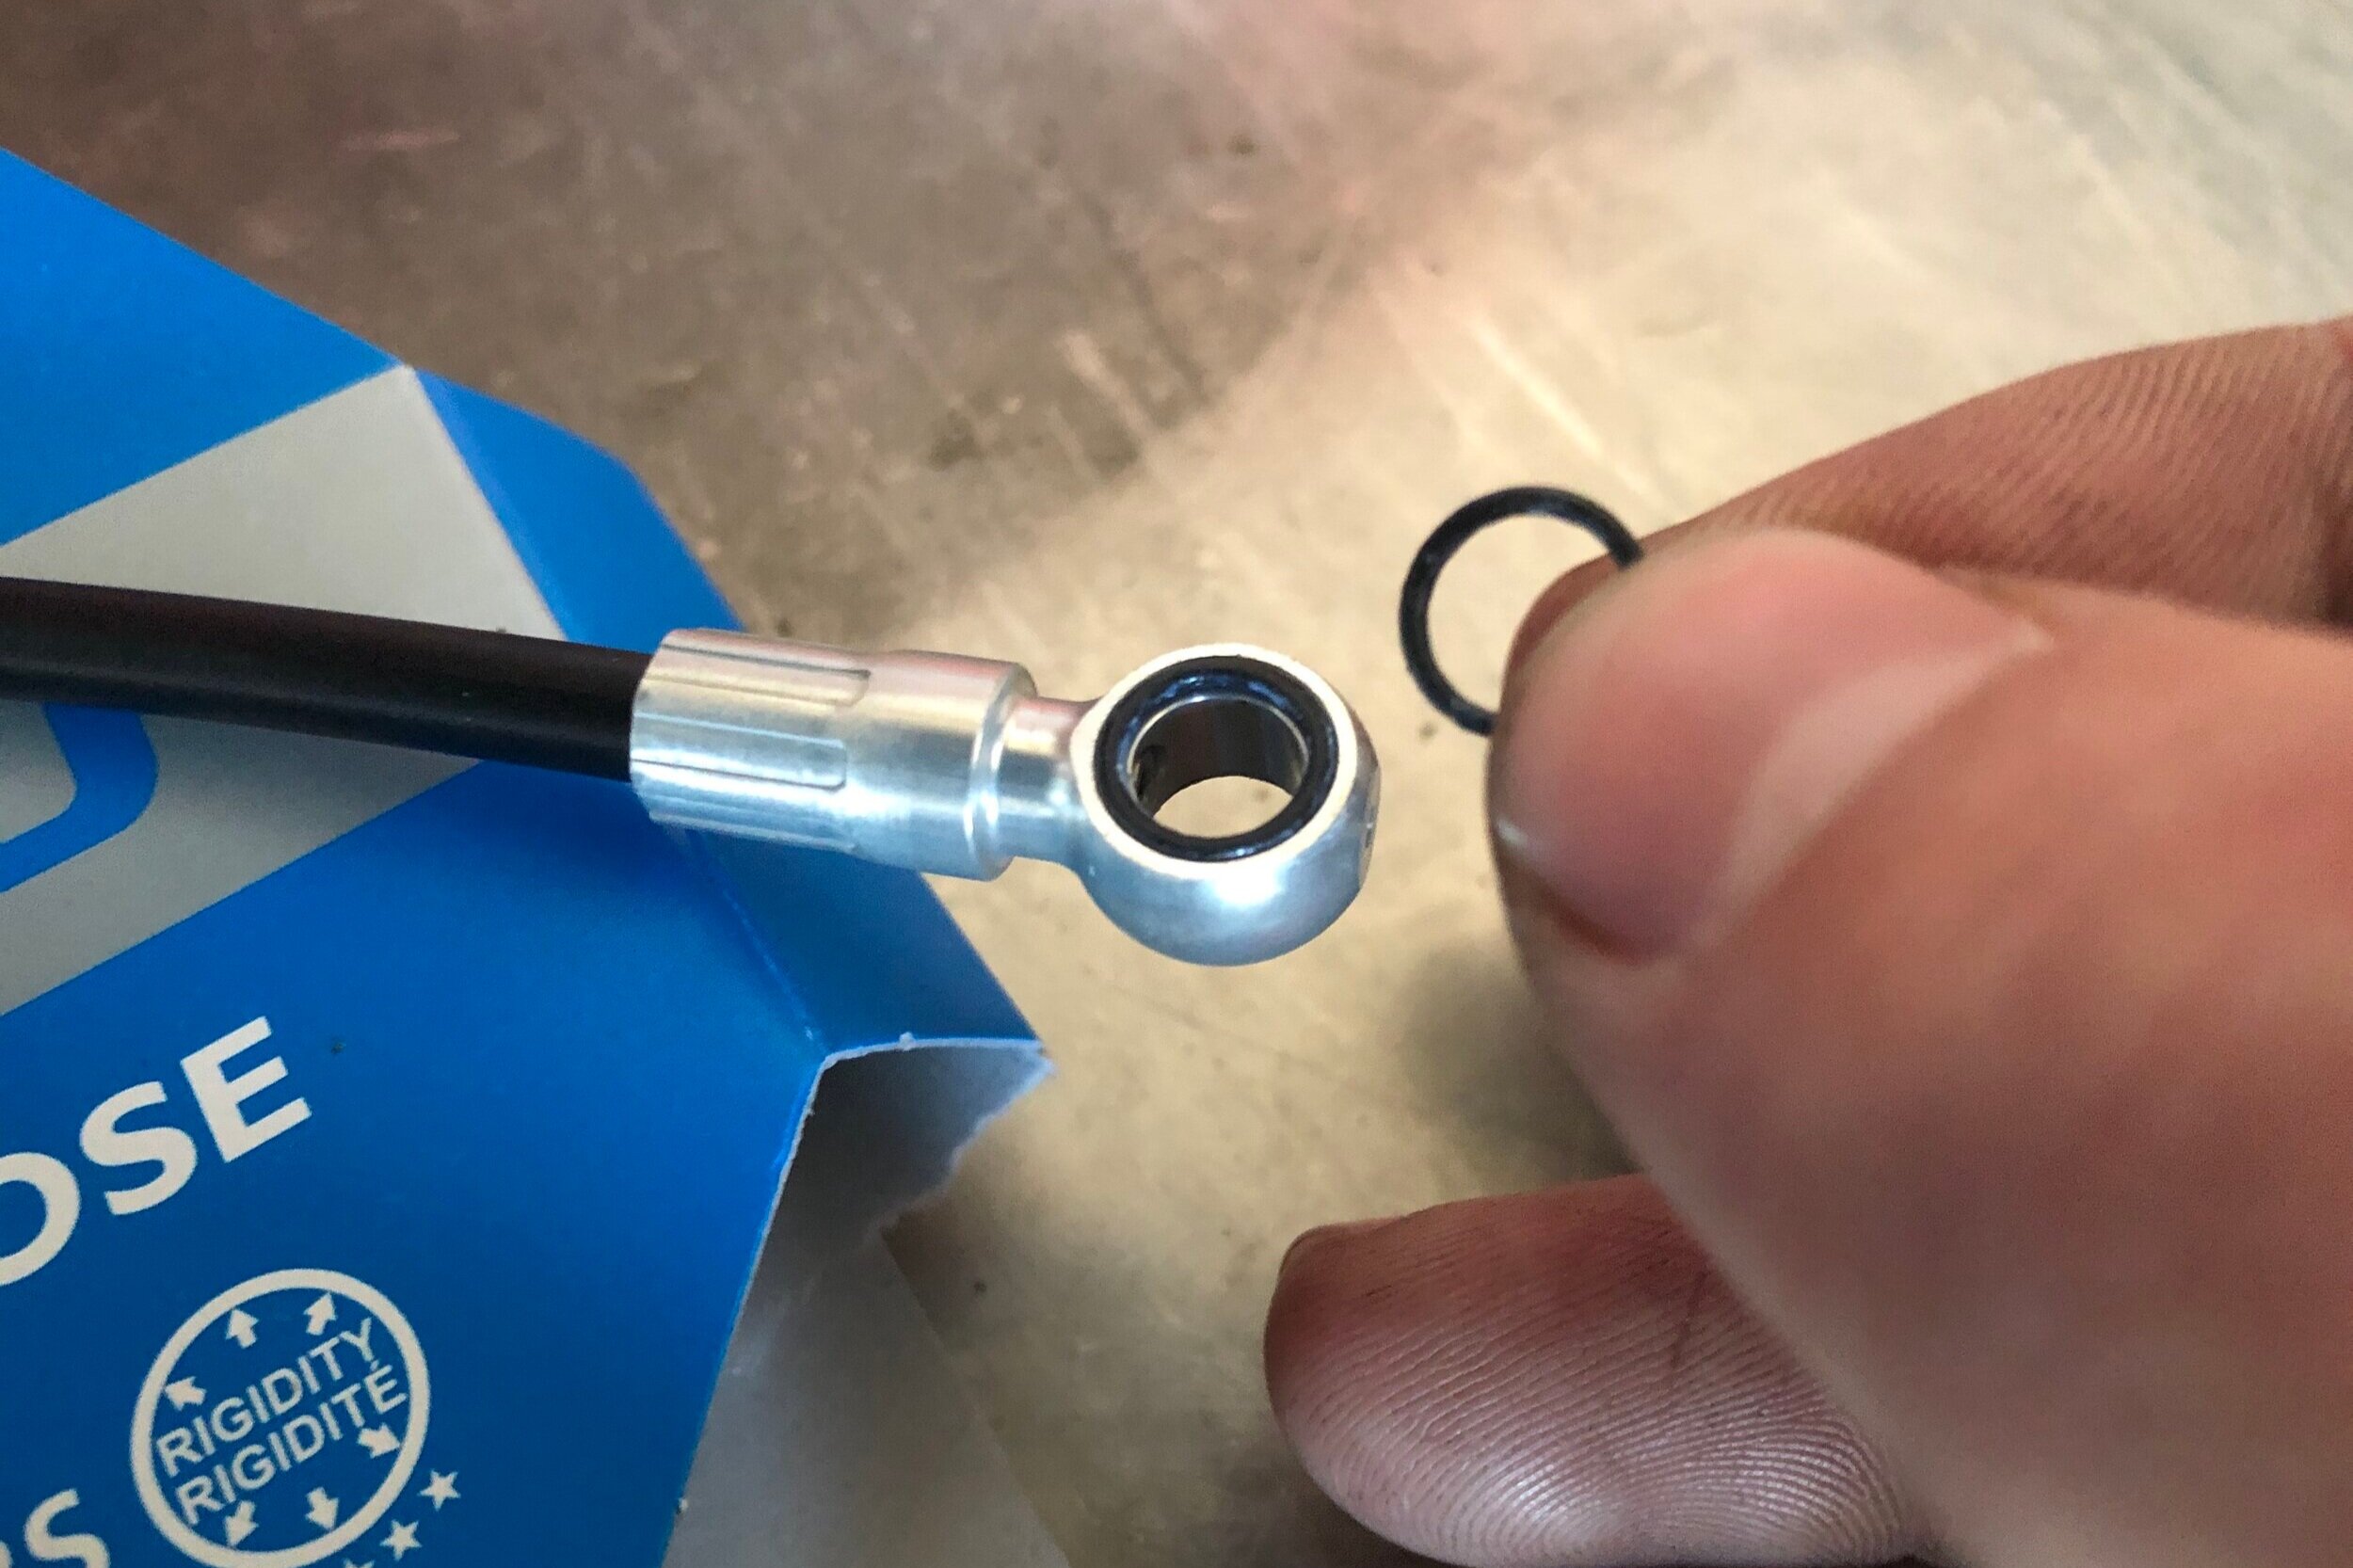

Next carefully place the provided o rings into the slots on the Shimano brake hose connector, there should be 1 either side (you can use the old hose for reference if you need) . Now using your allen key unbolt the old hose and set aside.


Now bolt on the new hose with the new bolt supplied being careful not to pinch the o rings when you tighten the bolt. It is a good idea to start routing the hose up the frame before fully tightening the hose to calliper connection to ensure the hose leaves the calliper at the right angle.
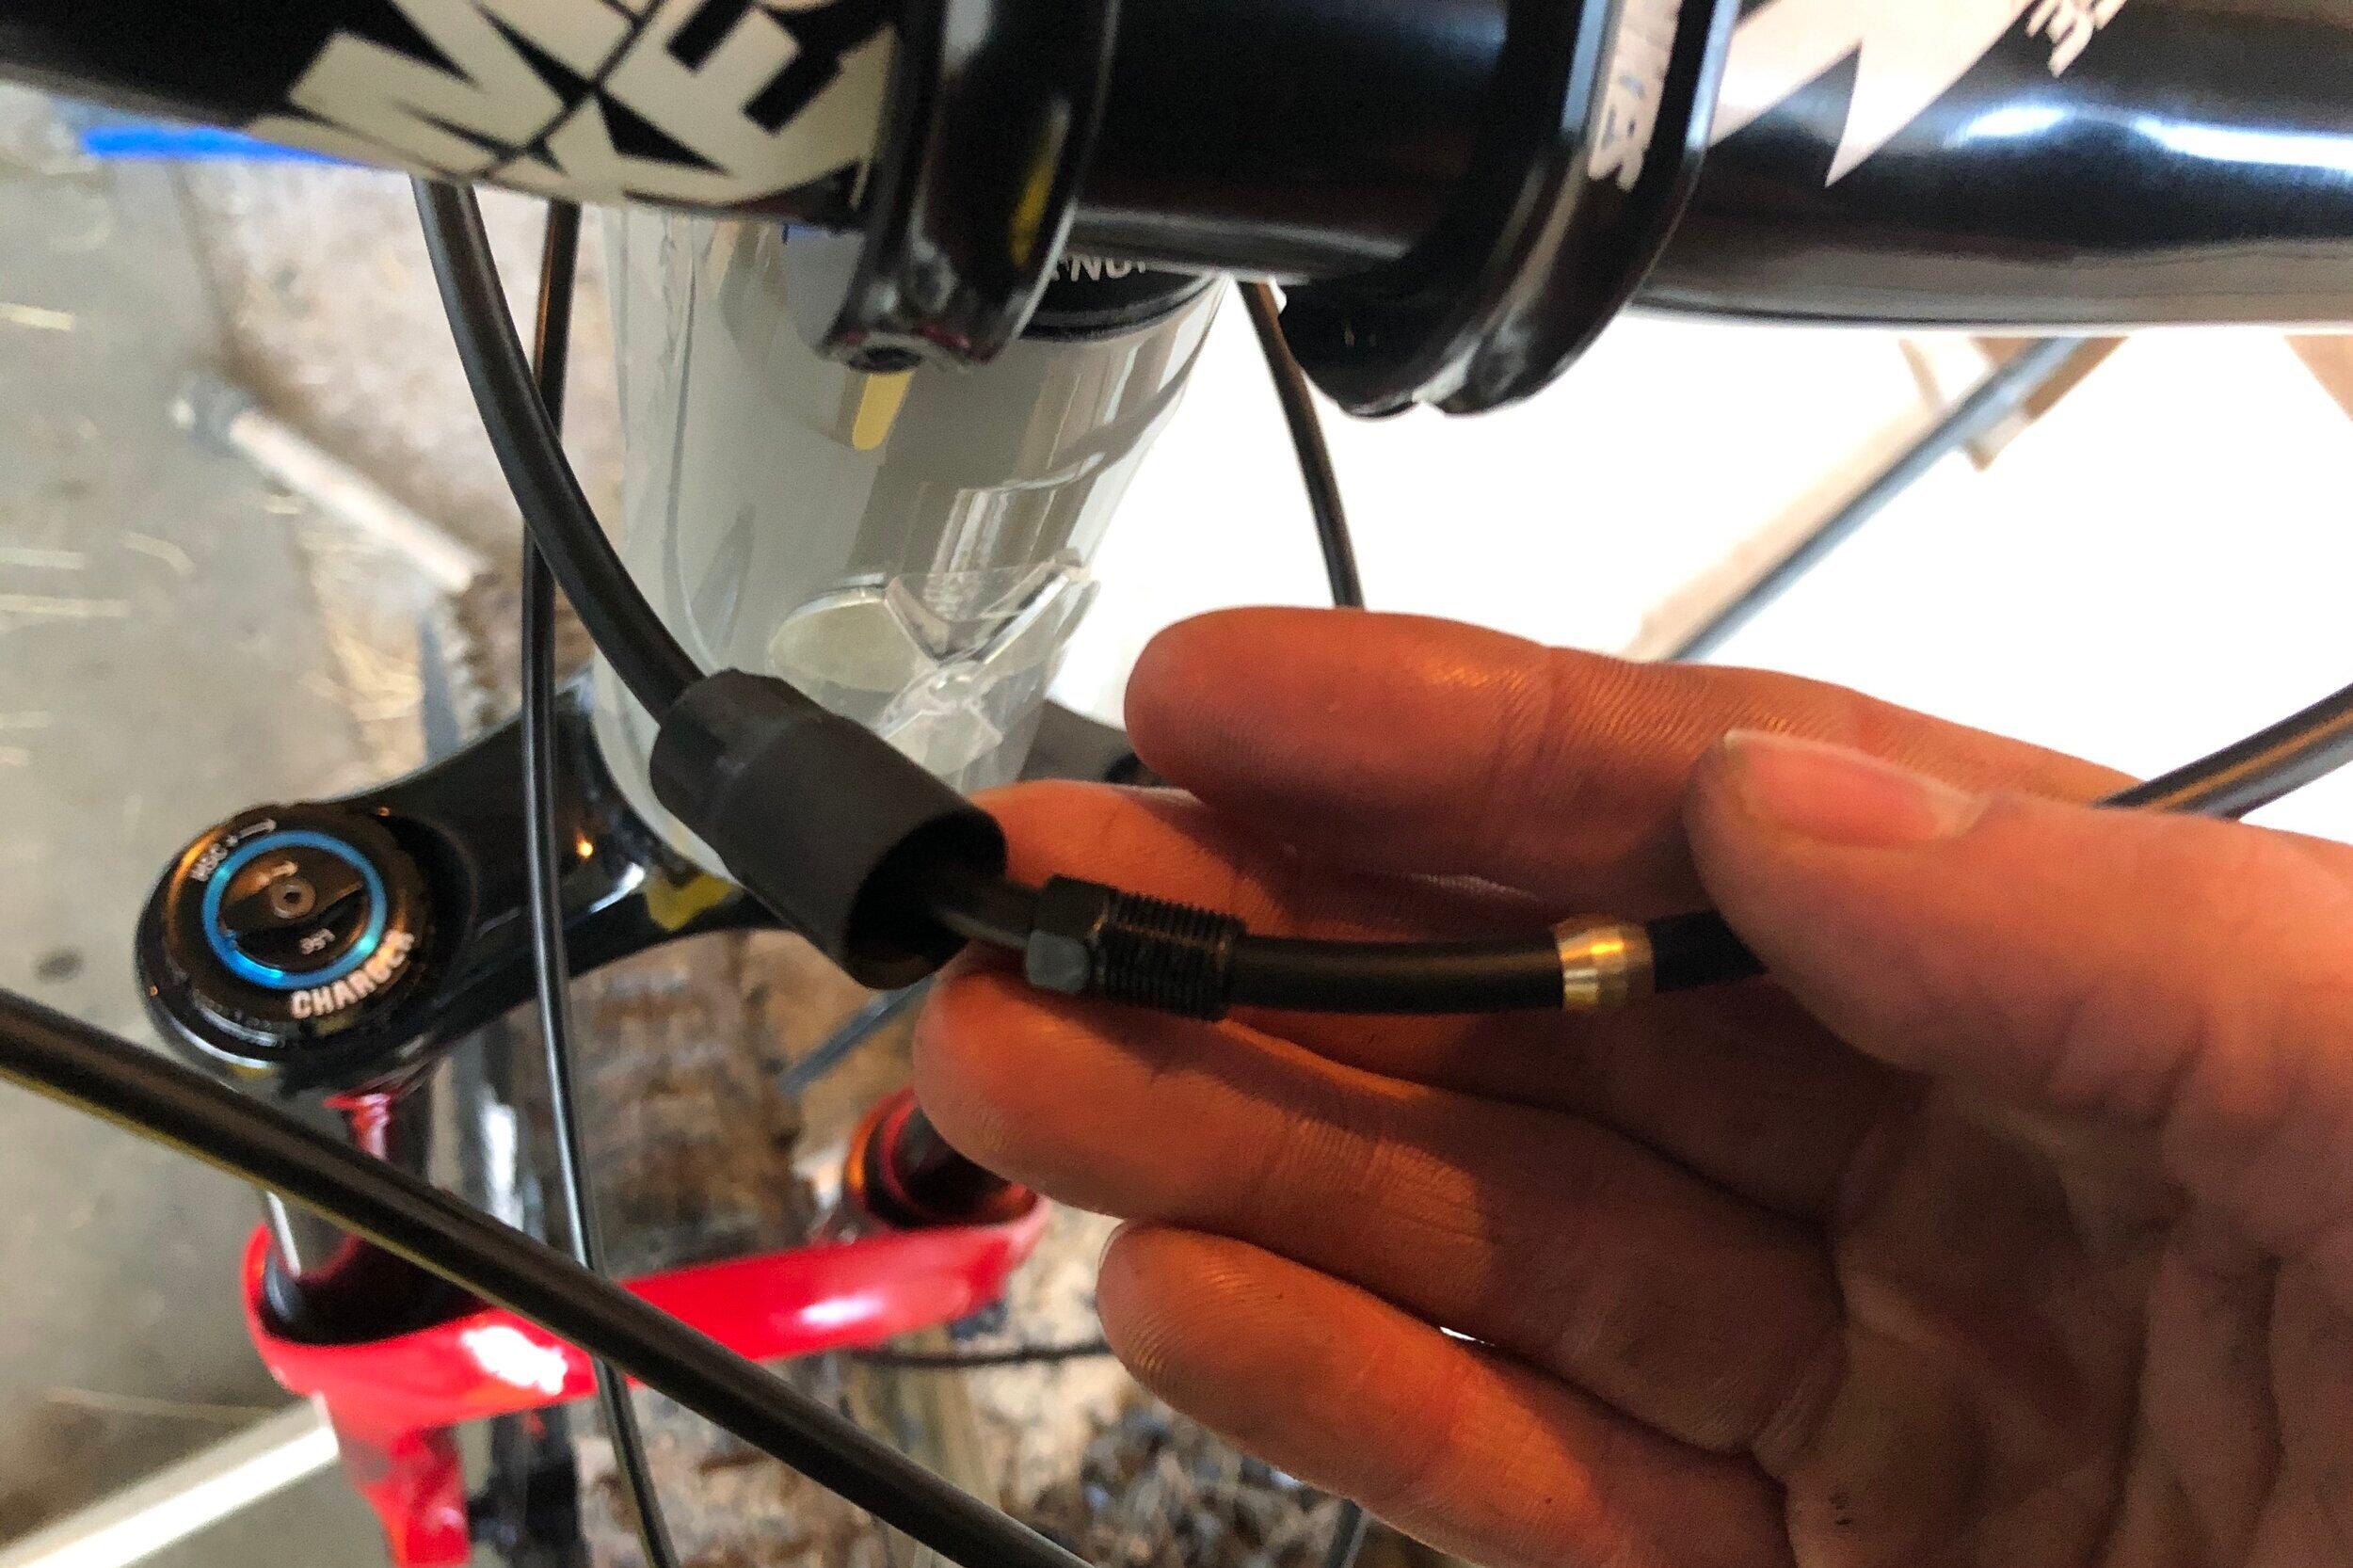

Next fully route the brake hose up to the handle bars and slide on the hose - lever connections in the order as pictured (rubber cover, bolt, olive). Note I have some foam sleeve to protect the frame from cable rub so if you have something similar it is a good idea to put it on now
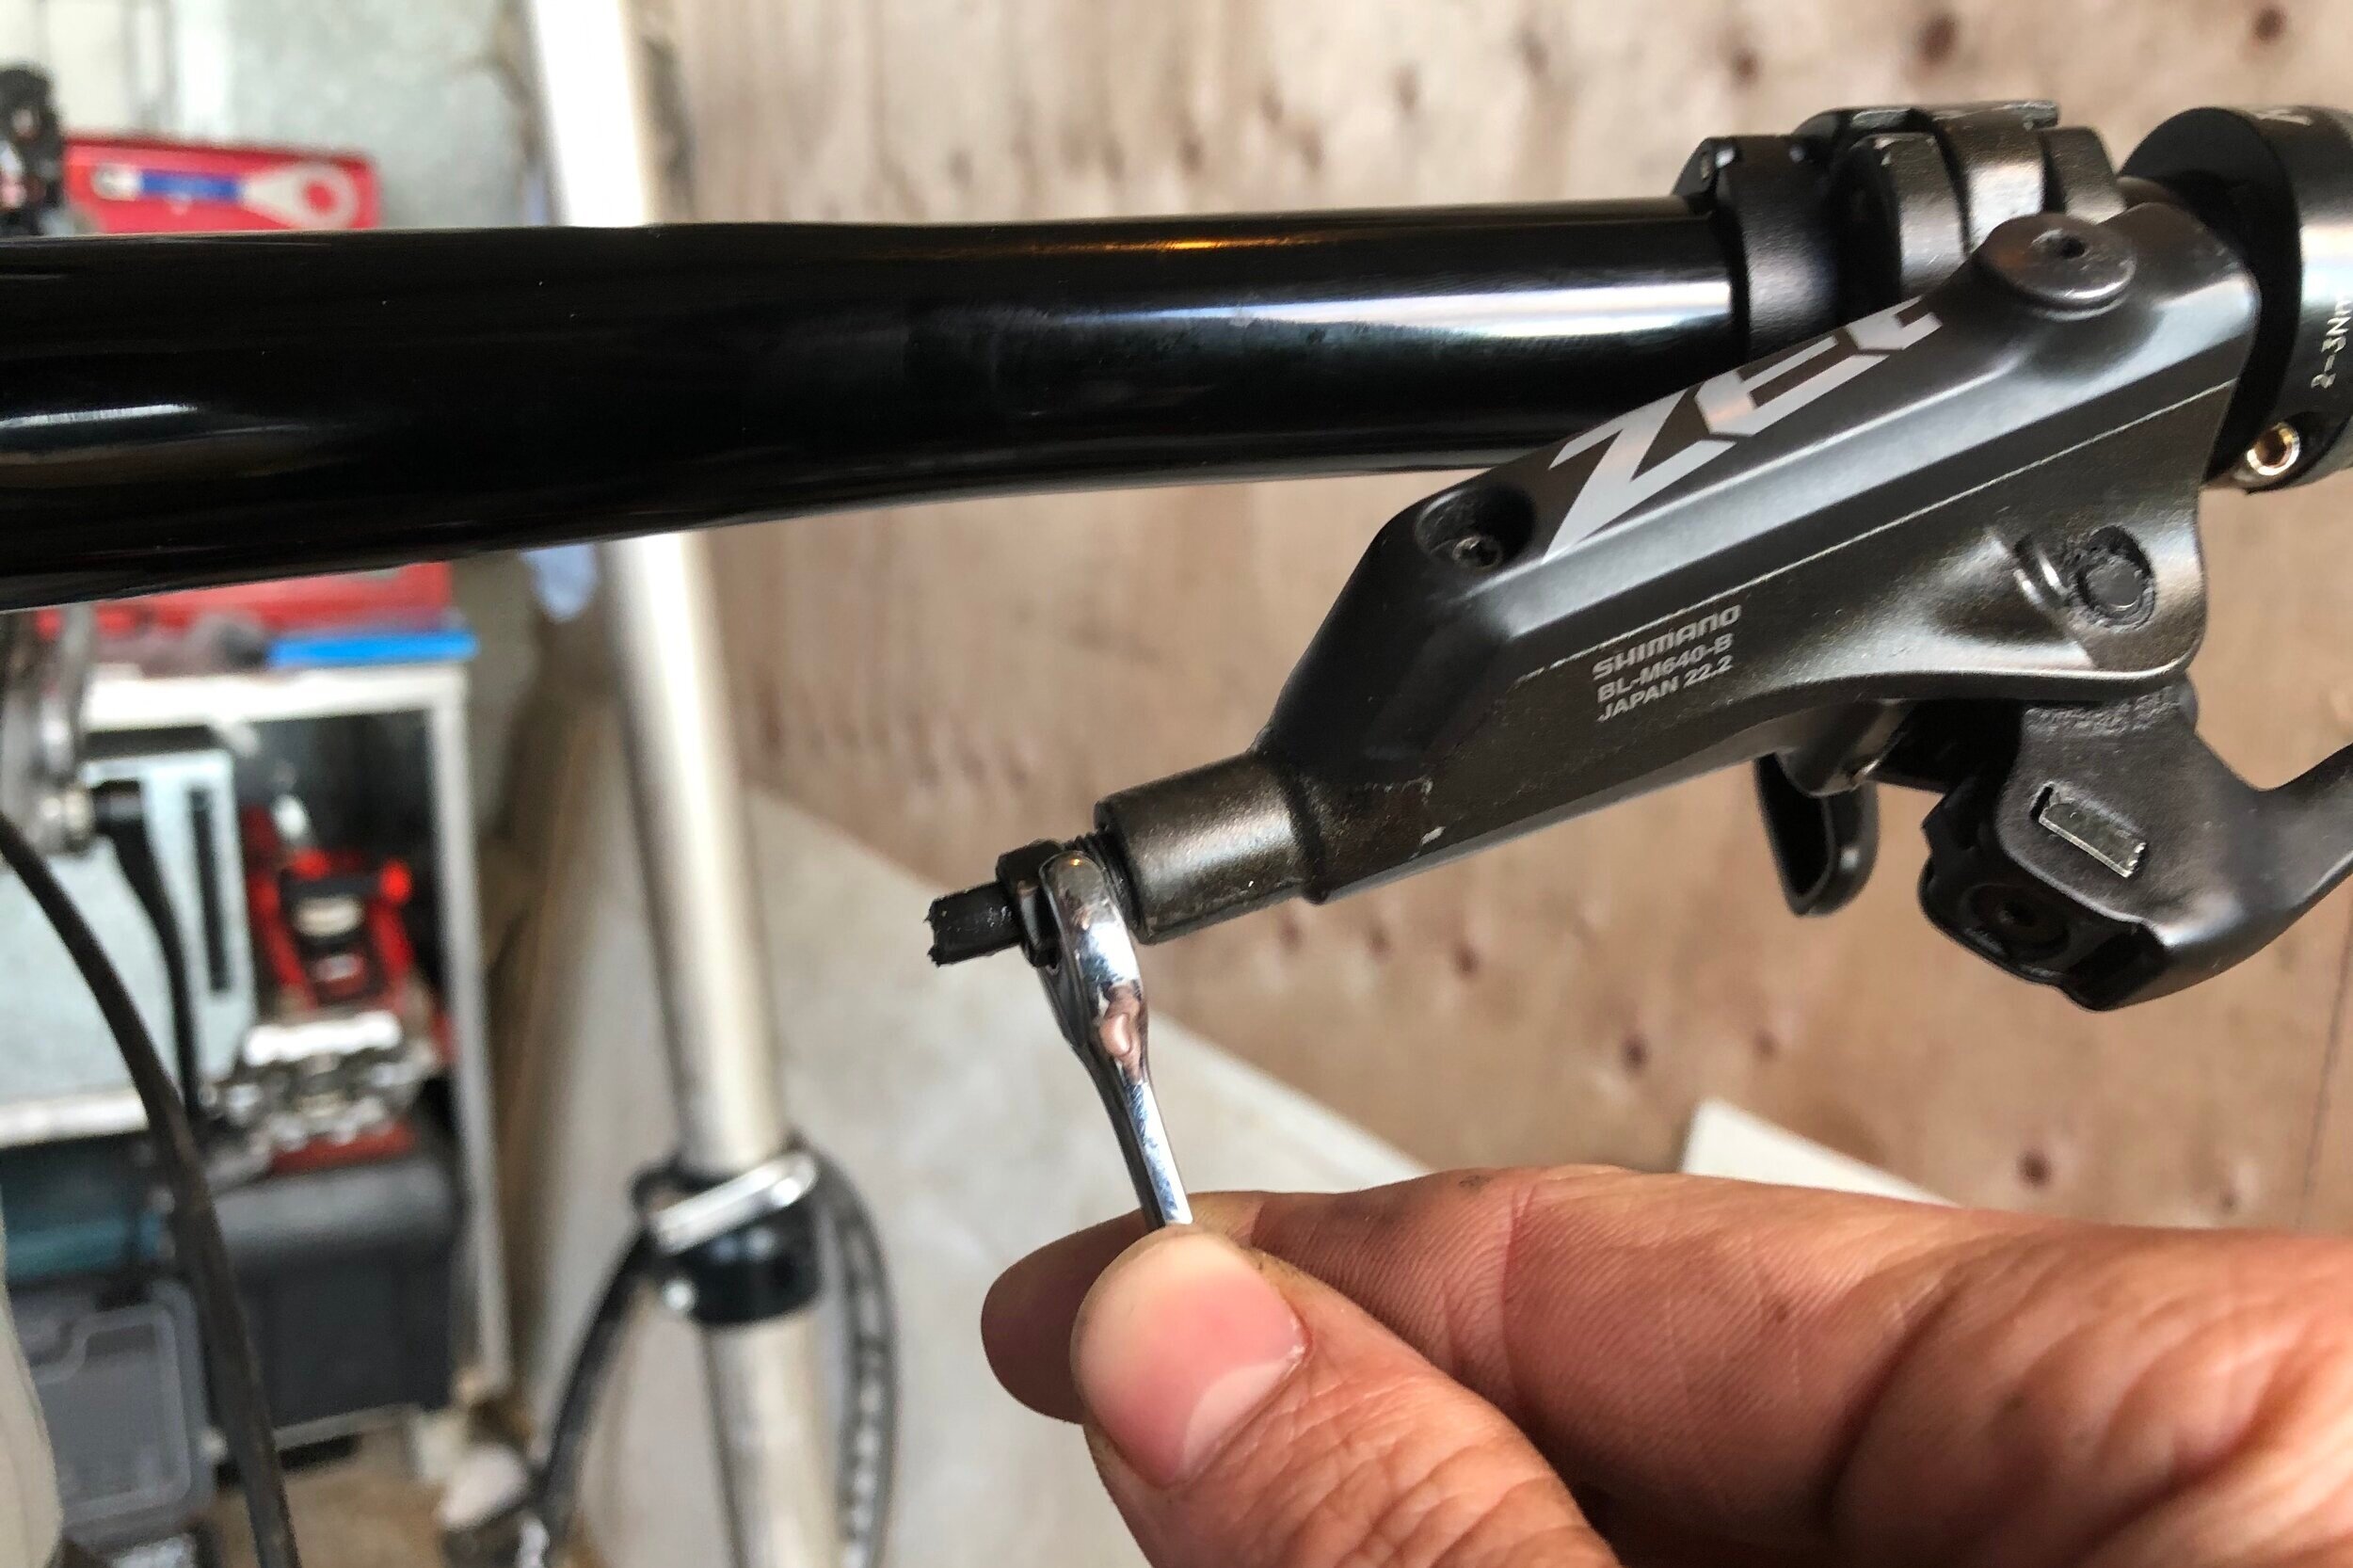
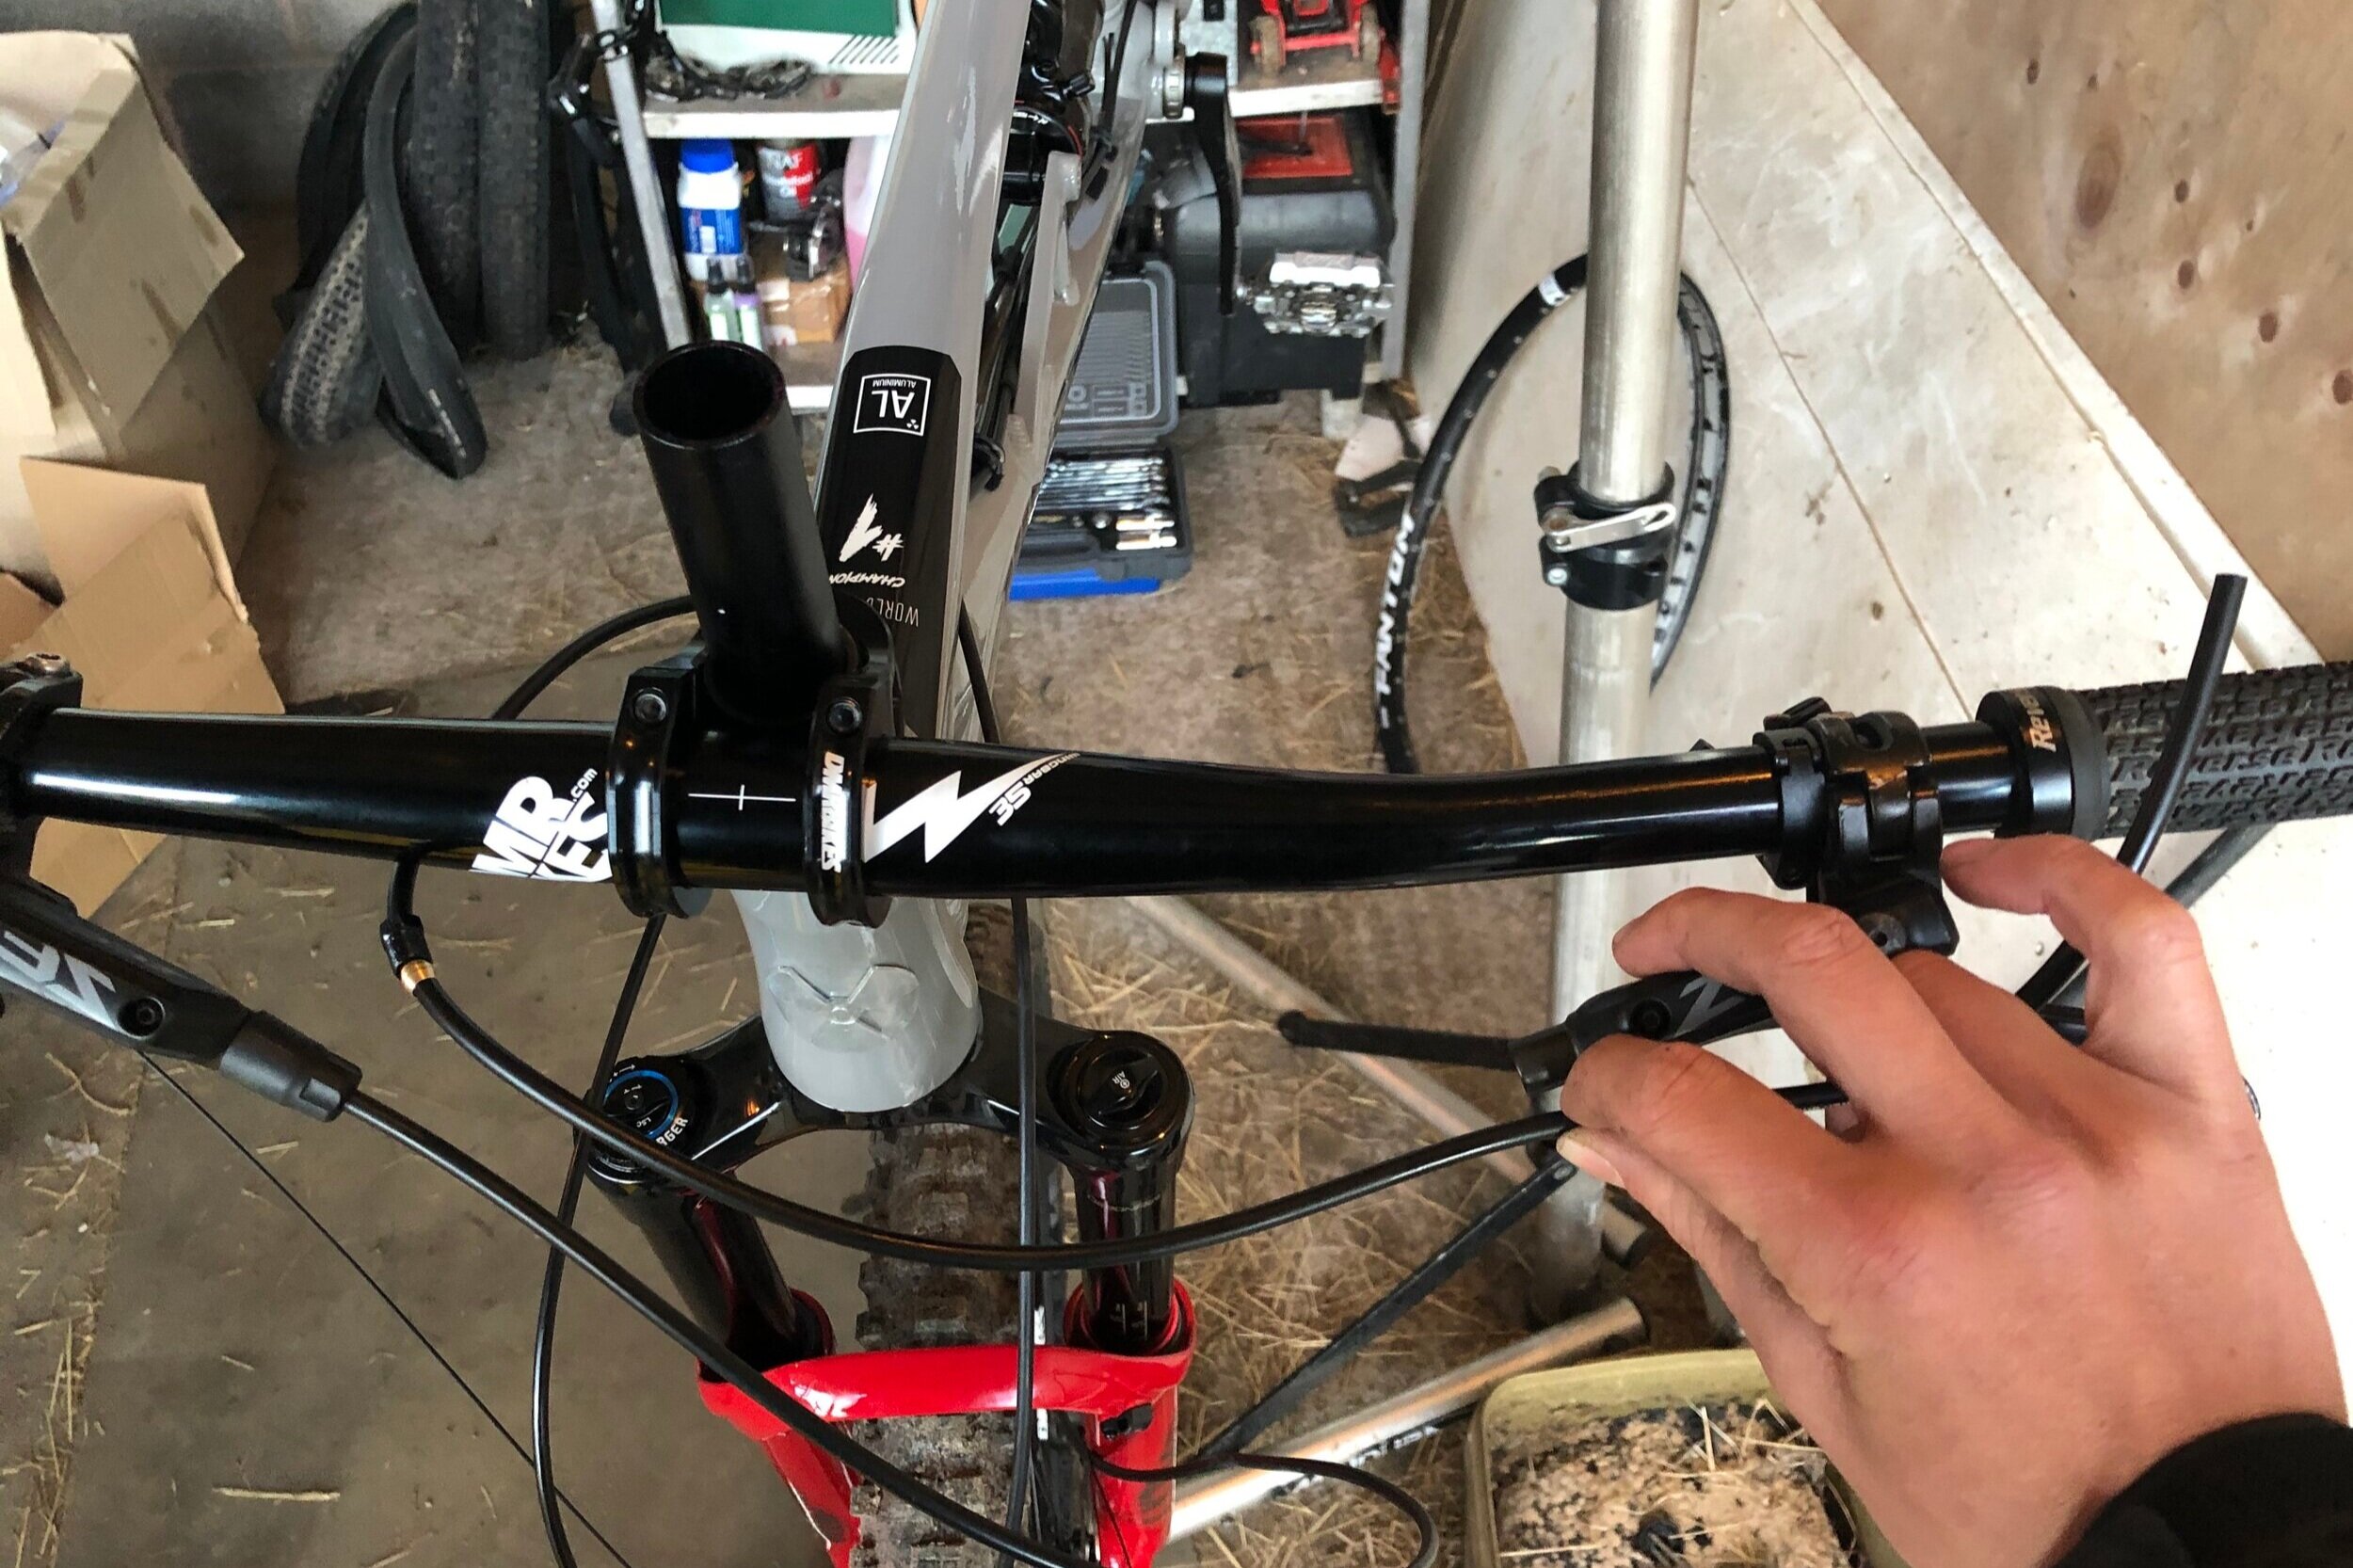
Next remove the old hose from the lever using the spanner, you may have to apply some pressure to the top of the lever so it doesn’t spin on the bars while you undo the bolt. With the old hose removed, offer up the new hose (again ensure you have fully routed it at this point) make sure there is enough slack to rotate the bars left and right without the disc brake hose being pulled too tightly.


Once you are happy cut the hose down. Inspect the cut end of the hose and if needs be, gently open it up slightly with a thin pick to accommodate the barb.


Insert the barb into the hose as far as possible by hand. Next grip the hose with the pliers and hose blocks, this can be a bit fiddly. Also ensure you don’t grip the hose too far up as it may restrict the barb from entering the hose. Then using a soft flat metal hammer or object similar press and tap the barb into the end of the hose fully.

Make sure the barb has been inserted fully before proceeding, the collar of the barb should be sitting flush with the hose.


While applying pressure on the hose towards the lever, carefully thread the bolt into the brake lever and tighten. It should feel a little stiff but keep tightening as it is the olive crushing to seal the hose into the lever. You will feel the olive crush and the bolt get tight into the lever, bite it up but be careful not to over tighten… don’t go too mad!

Finally slide the cover over the hose. You will now need to perform a full bleed of the brake which we have covered here if you need some help. Good luck with the fresh brakes!!